 Category: Winemaking
You Never Forget Your First Crush
Scott Elliff of DuCard Vineyards once told me that harvest was a joyous time, the culmination of a year’s hard labor tending the vines. And on September 21, after four years of planning, preparation, and hard work, we experienced that joy in our own vineyard, picking grapes from the vines we had planted with our own hands and nurtured like our own children. If I’m at this ten years from now, I’m sure I’ll still find joy in the harvest, but I doubt that it will be anything like the euphoria I felt as we picked those first Cab Franc grapes this year.

Using a refractometer to check the Brix (sugar levels) the night before harvesting.
To recap a bit, the Vineyard Goddess and I began this adventure some four years ago. We took classes on viticulture and enology at Piedmont Virginia Community College, did lots of research on our own, debated which clones and which rootstocks to order, and finally planted our vineyard in the (very) early spring of 2012. Since then, we’ve invested a lot of sweat, a couple of tears and even a little blood (I snipped my finger with the pruning snips during the harvest) in bringing those vines to the point where they were ready to produce a crop of grapes worthy of picking.
And, oh my God – did those vines ever produce!
The Cab Franc and the Petit Verdot were absolutely magnificent: nearly perfect fruit that proved irresistible to the bees that laid siege to those rows of vines. The Merlot, for whatever reason, fell behind. I had thought we’d pick the Merlot first among the reds, and by all rights we should have. But after accumulating sugar at a rapid pace, the Merlot vines just shut down. We picked them October 5, and I’m hoping for the best.
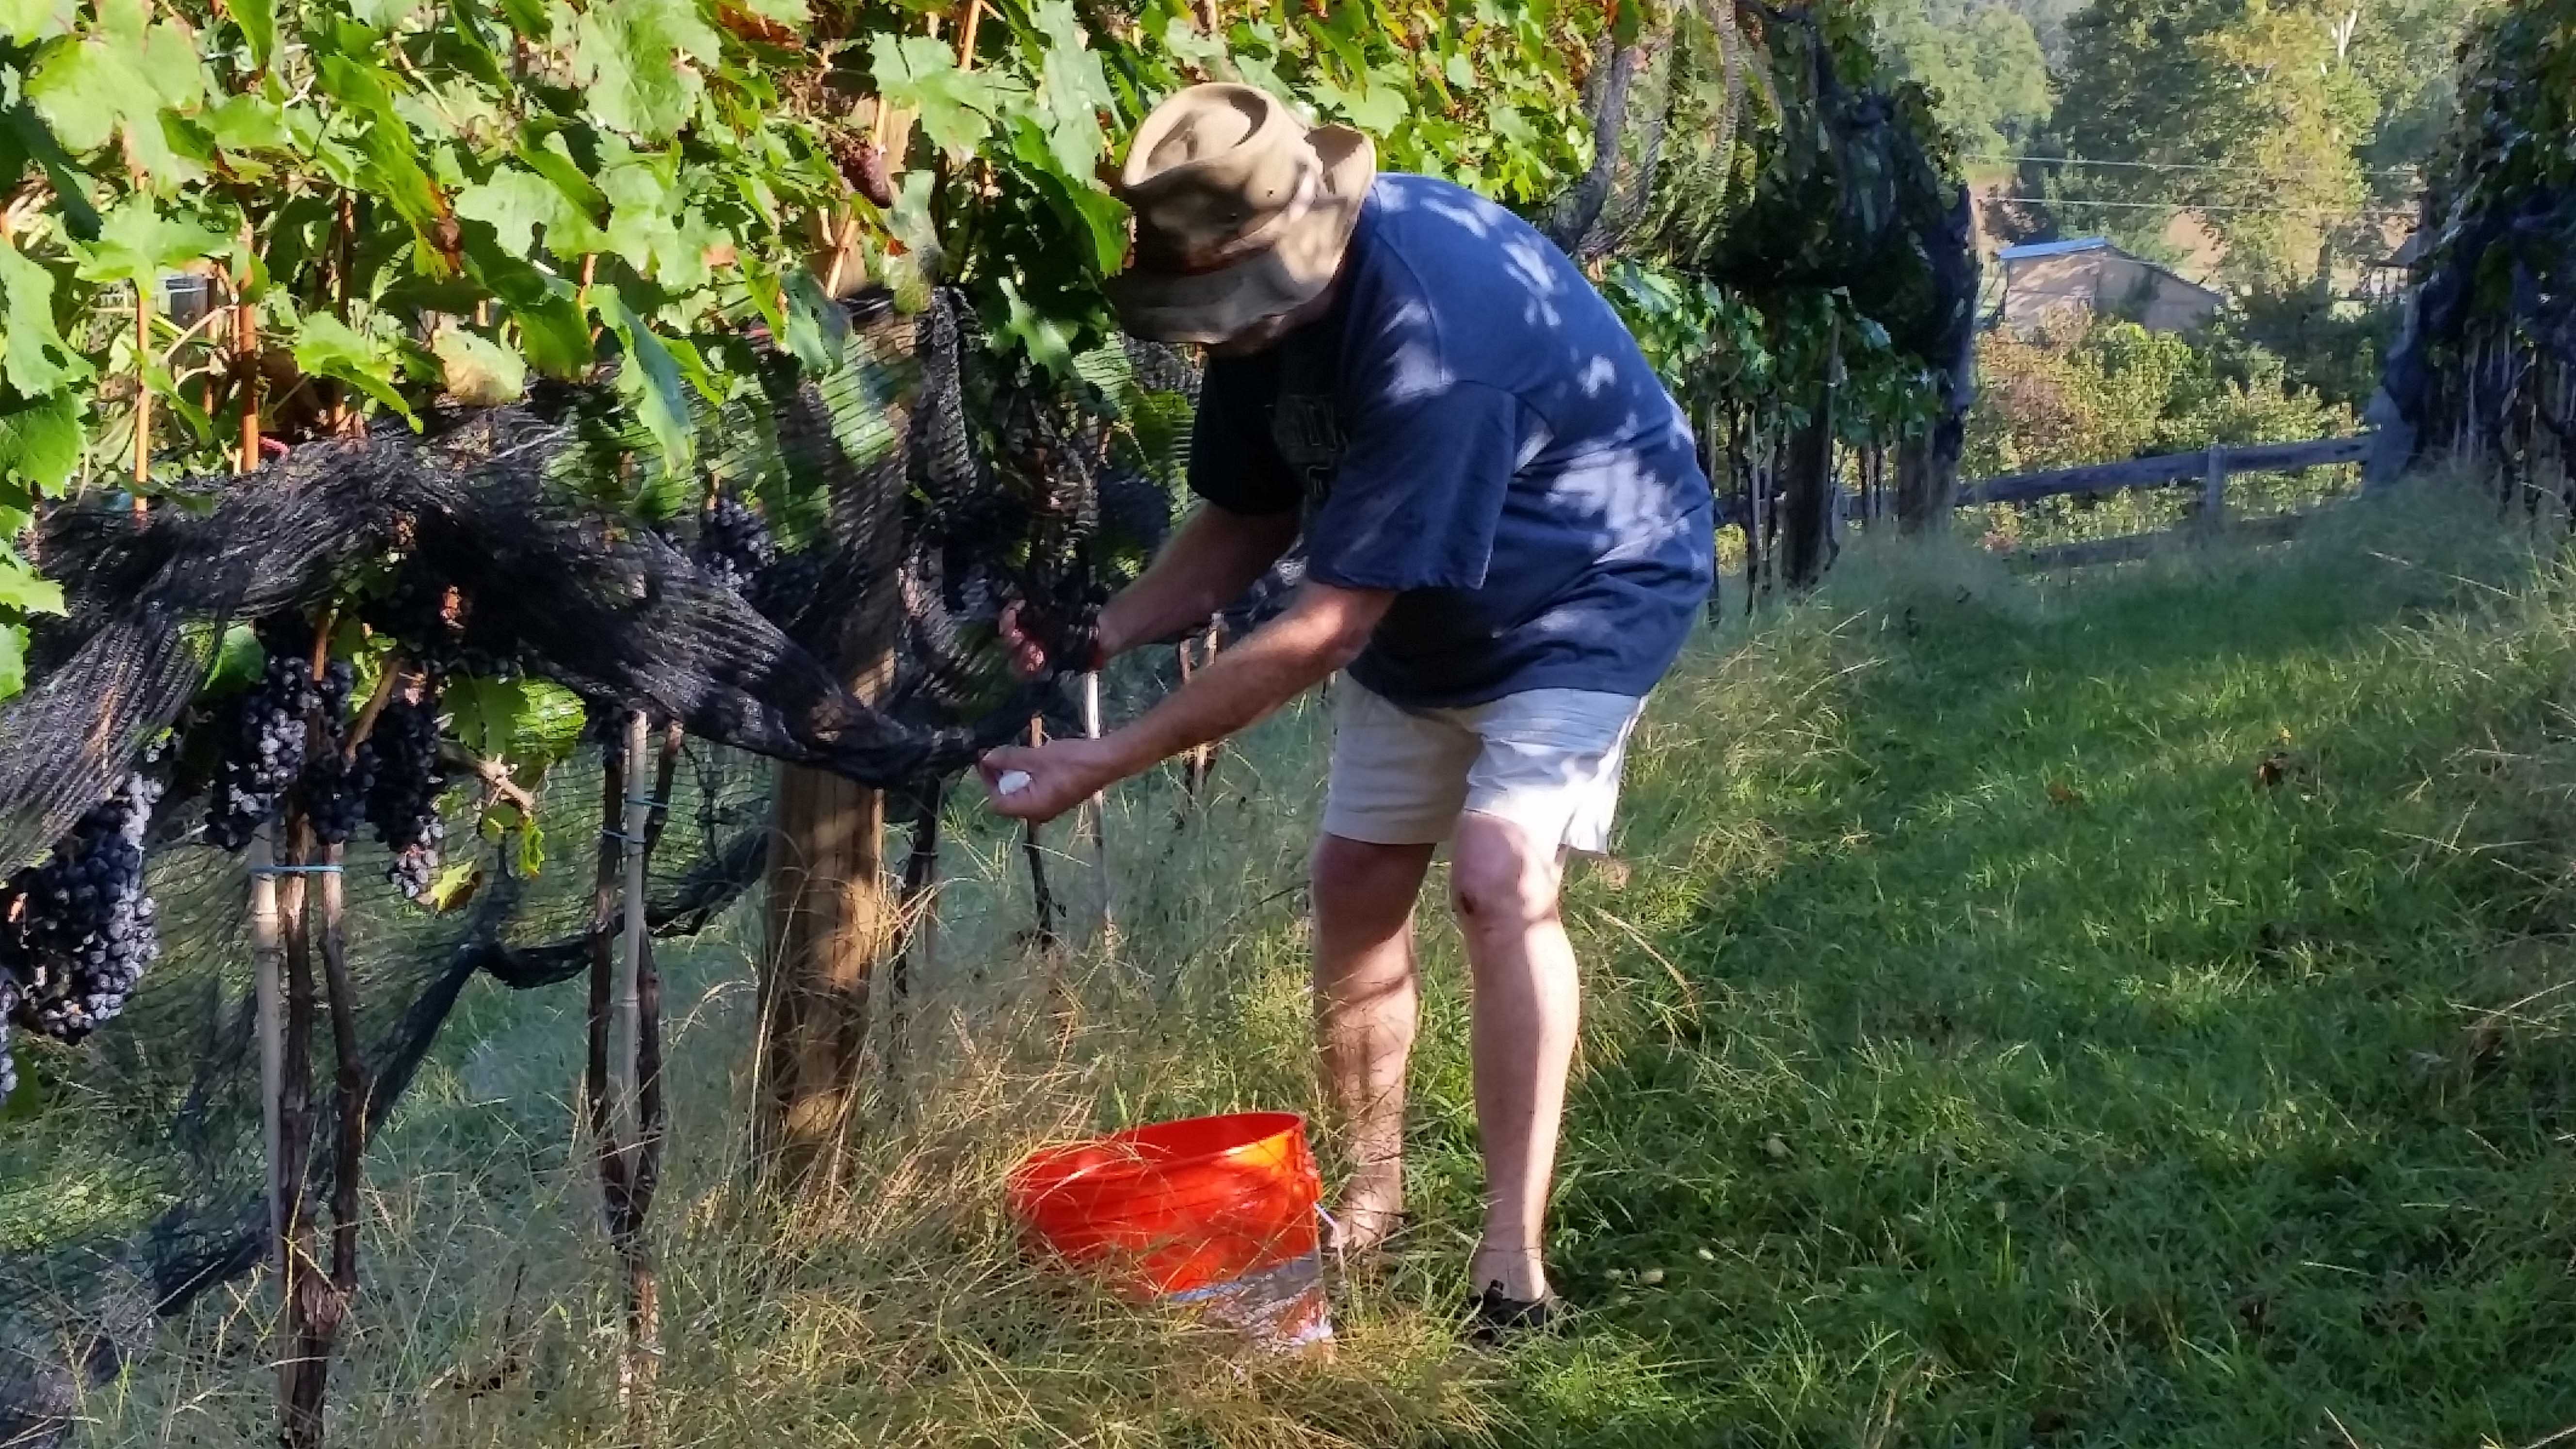
Picking the Cab Franc. Started at first light, just finishing as the sun is starting to rise.
The Viognier was disappointing. Virginia-grown Viognier makes a wonderful wine, but it’s hard to grow. For some reason it’s subject to something called primary bud abortion, and I guess our vines experienced that phenomenon, because the Viognier was the least fruitful of all our varieties. The grapes looked lovely, but I had expected about 100 pounds or so, and we got about 20. Other vineyards around the Commonwealth had the same experience, though on a totally different scale (the difference between tons and tens of pounds).
The last of our varietals is Petit Manseng, and those grapes looked beautiful when we harvested them two weekends ago. We want to make a desert wine from them, and so we let them hang a bit longer than we might have. We had hoped they would accumulate a little more sugar and lose a little more acid. If we had known we were in for some pretty significant rain the week prior, we might have chosen differently, but weekend vintners like us have to make some tough decisions and then live with them. As it turned out, we didn’t get the extra sugar or the lower acidity. We’ll work with it.
But getting back to where I started, there are some things you never forget. I can still remember the first crushes of my life – the first time I saw the Vineyard Goddess in the newsroom of our college newspaper, the first book I really fell in love with (thank you, James Joyce), the first time I saw my children, and the first time I saw Venice, walking out from the train station on a beautiful sunlight day to see the Grand Canal sparkling with life. Some things you just never forget.
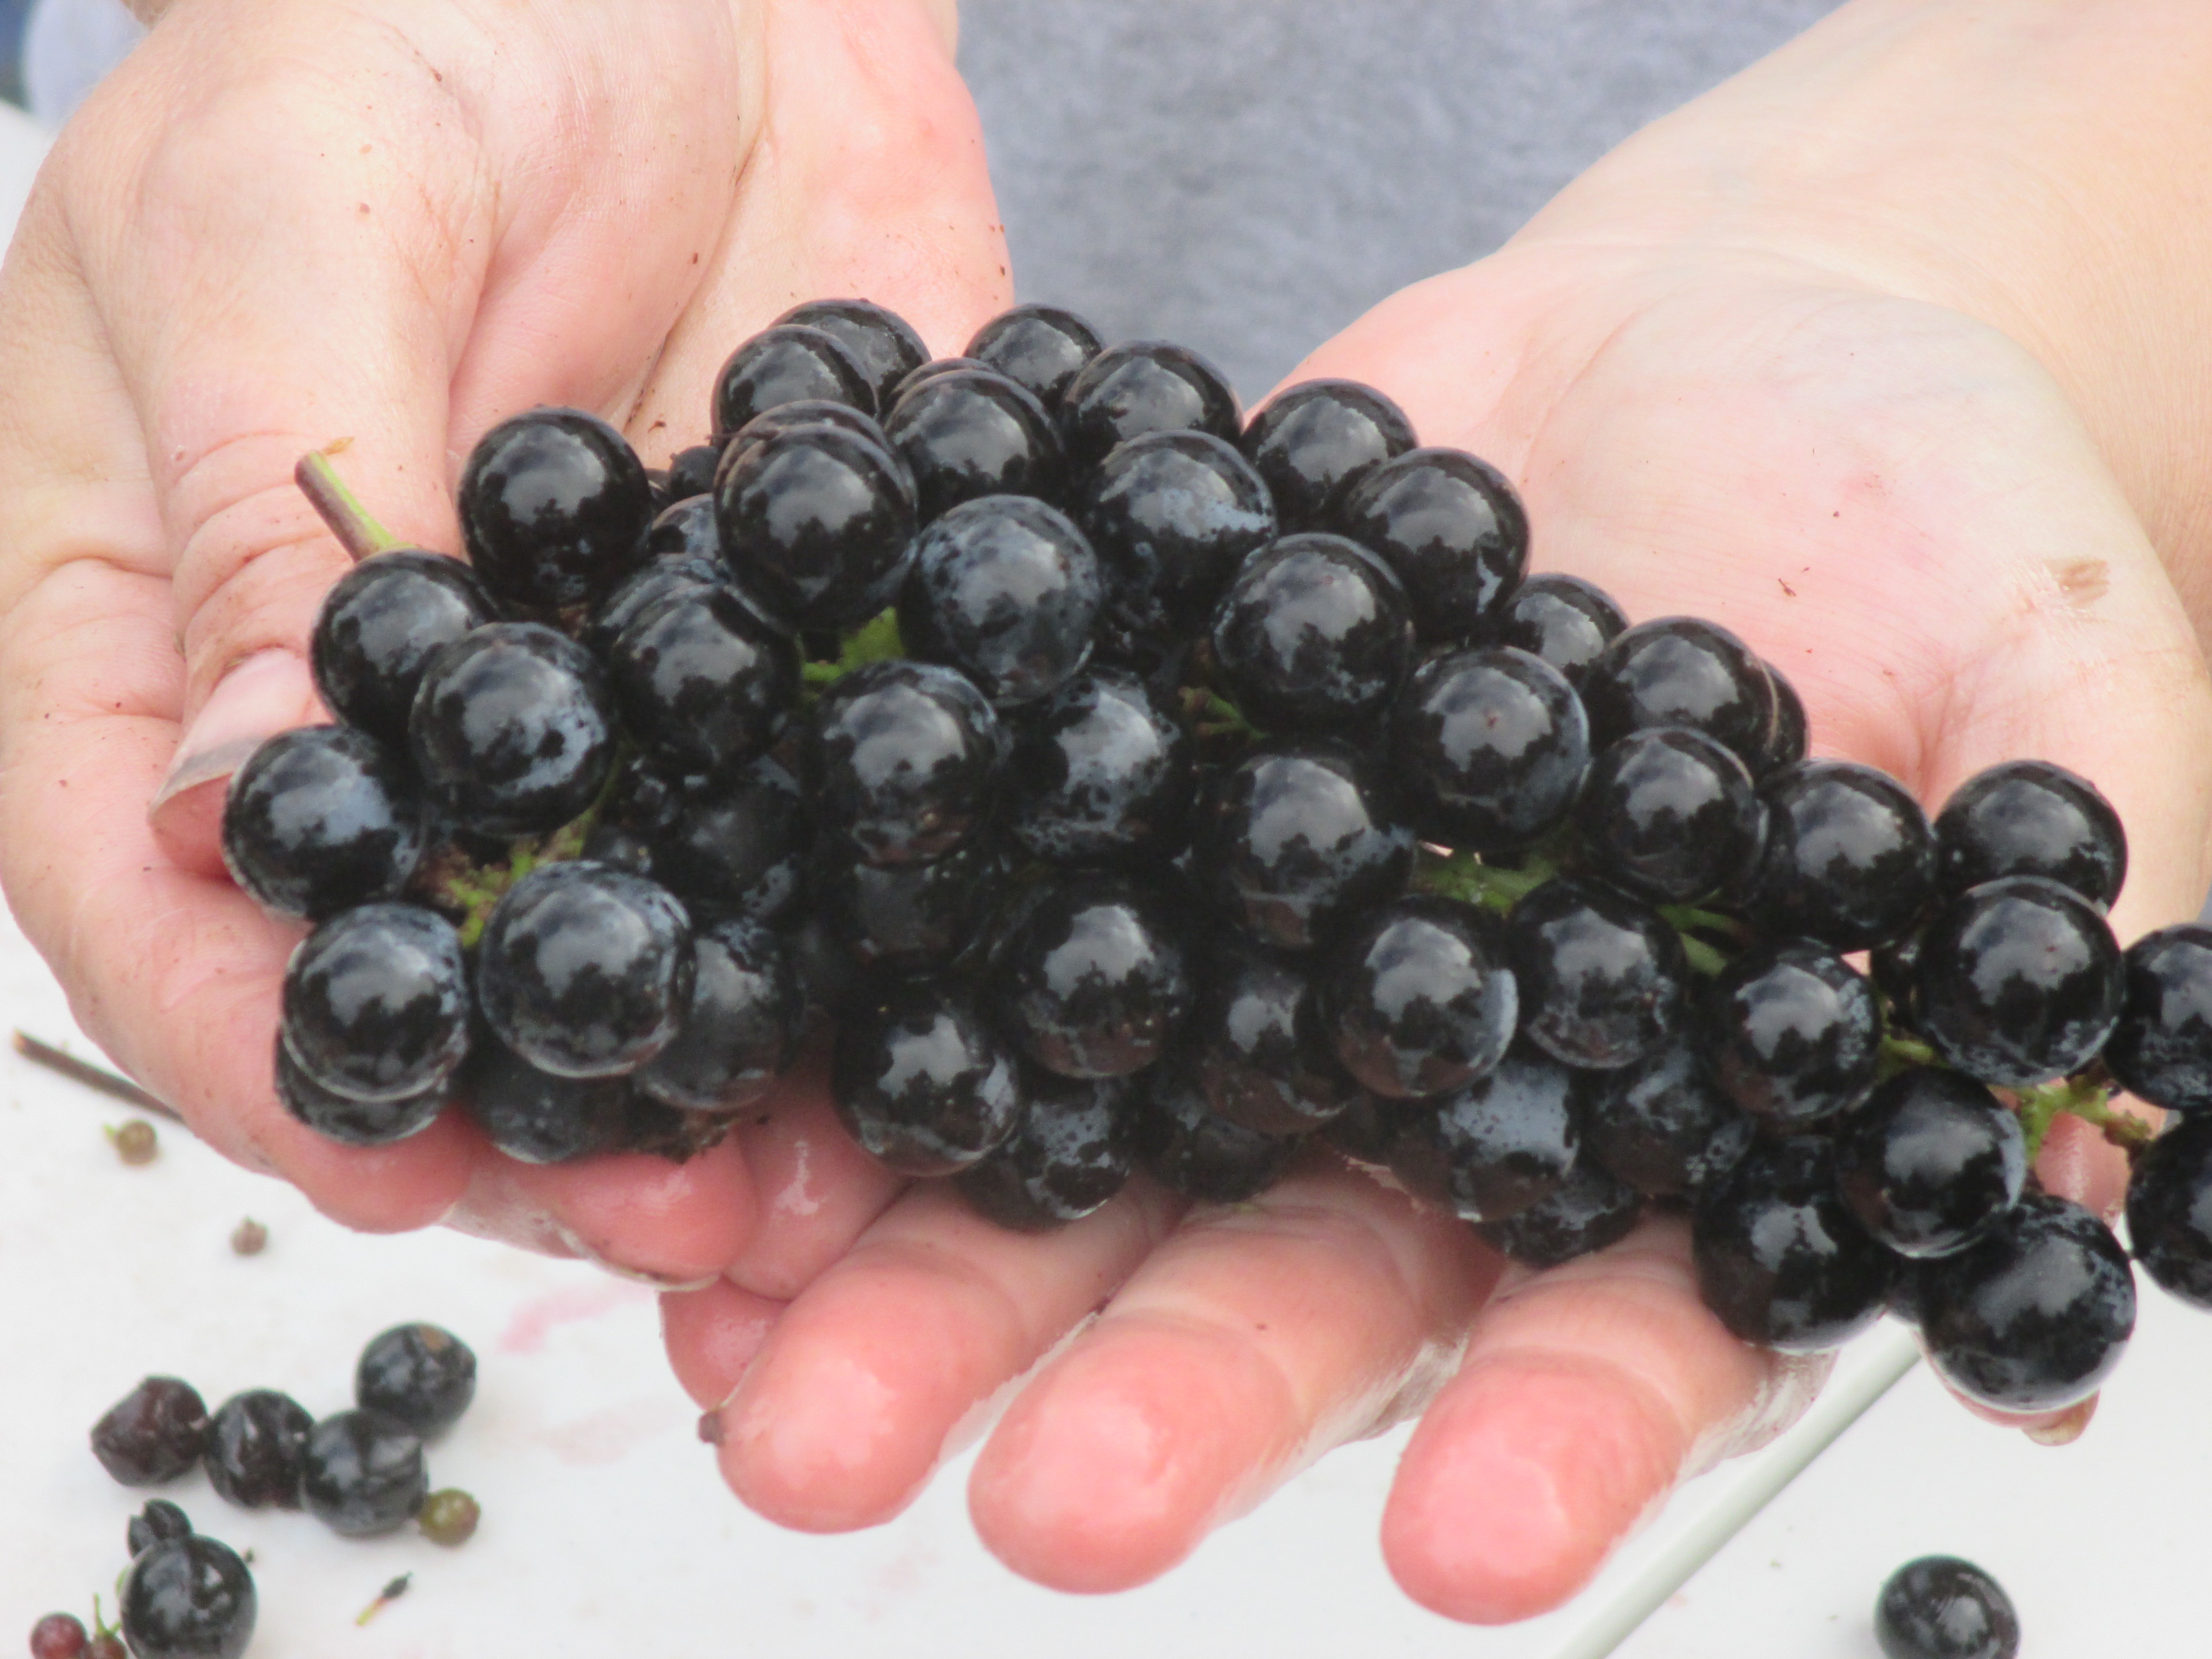
The Petit Verdot (and for that matter, the Cab Franc, could not have been any more perfect.
And so, I don’t want to get too sentimental about this, but when we had finished picking the Cab Franc on that beautiful September morning, the VG and I hugged and felt a sense of euphoria. All those years, all that sweat, and all that worry behind us; now we had the fruit of our labor in front of us, collected in a dozen five-gallon Home Depot buckets. It was one of the most wonderful moments of my life.
A little detail: we had gotten up at first light that morning to pick, and we finished before the sun hit the vines. The early morning, especially this time of the year, is cool, and you want the grapes to hit the crush pad (i.e., our driveway in Fairfax) cool. The crush, by the way, is the term applied to the harvest and the process of preparing the grapes for fermentation.
As we picked, we stored buckets in a refrigerator we had purchased just for this task. With the shelves removed, we could fit six buckets, stacked on top of each other, separated by the shelves I had pulled out and repurposed. As we brought more grapes up from the vineyard, we pulled the buckets from the frig and dumped them into a 120 quart cooler from Costco. When it was filled, we pulled out smaller coolers. The grapes were cool to the touch right up to the crush, and the must came in at around 60 degrees or lower.
As it turned out, picking the grapes was the easy part. I had done a lot of research and reading, a lot of planning, and a lot of online shopping for the equipment and supplies we would need. But for all that work, when it got down to actually making the wine, I found myself in the weeks before the harvest feeling a bit lost.
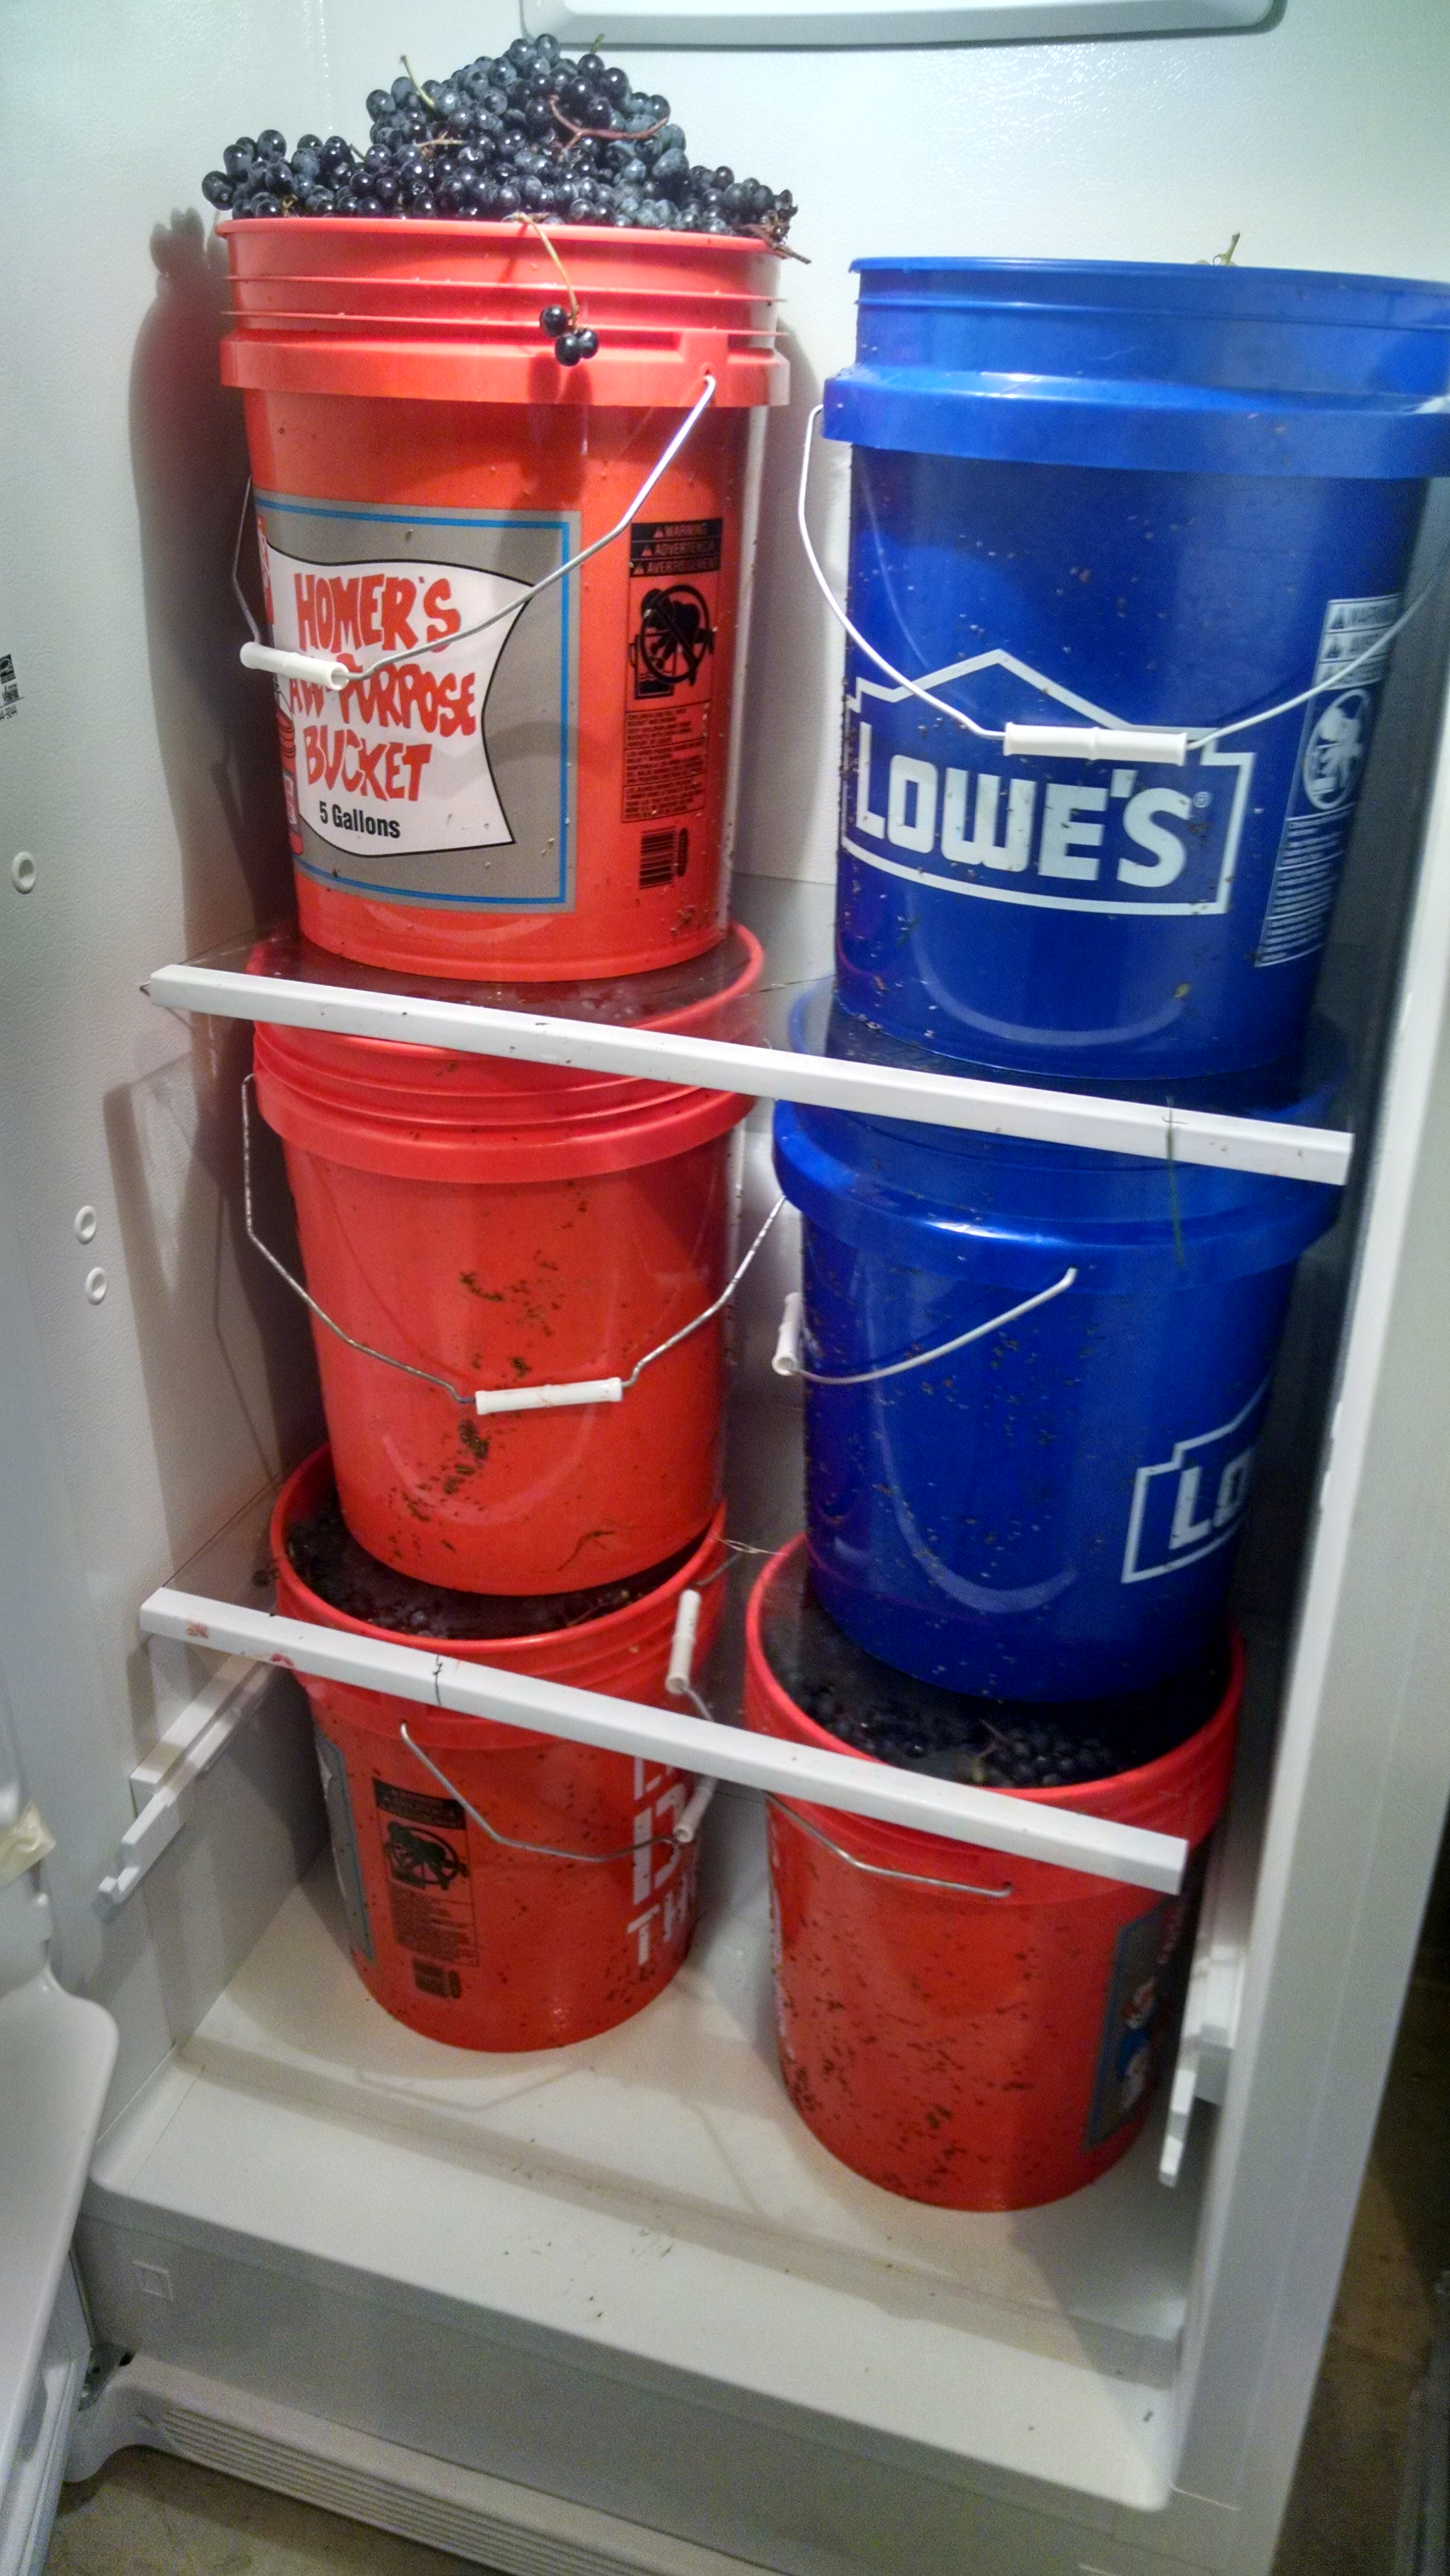
A refrigerator full of wine grapes — this is about half the load of Cab Franc. We dumped these into the cooler and refilled the frig.
So, before we picked the first grapes, I started making a cheat sheet. It went something like this:
First, add sulphur at a rate of 50 parts per million (.33 grams per gallon), which kills off unwanted natural yeasts and protects the must (the mix of juice, skins, seeds, and stems that will turn into wine) during those vulnerable hours before fermentation begins. Next, check the brix, pH and TA (titratable acidity) of the must (add a dozen steps here). Rehydrate the yeast (add a half-dozen steps here). And so on. (Add dozens and dozens of individual steps.) And for all that, I found myself furiously reading the instructions (again) on my lab test equipment to be sure I knew how to test the TA, and reading other literature on hydrating and preparing yeast.
When we arrived back in Fairfax, we started with the easy stuff: the sorting table. We had purchased a folding table, which turned out to be the perfect place for the family and friends to gather around for some work and talk. Kind of like what I imagine a quilting bee was like a century or so ago. We pulled some chairs around the table, and the VG and I, plus daughter Kate and a couple of neighbors, sorted the grapes. That’s easy and straightforward, but it’s also very time consuming.
The fruit was amazing, so we didn’t throw away very much at all. Mostly, we were looking for MOG – matter other than grapes. We found the occasional spider web (with the spider, in most cases, which elicited a few screams), and some extra leaves and such. But the fruit that went into the crusher was just about perfect.
The crusher-destemmer was way more of a machine than we really needed. It crushed the fruit faster than we could drop it in, and we were finished with that part of the process in maybe ten minutes. Honestly, cleaning it took way longer than the actual crushing. But I’m still glad I bought it. More on that in another post.
In the end, the Cab Franc yielded some 20 gallons of must – juice, grape skins, seeds and some stems that fell through the destemmer. As luck would have it, I had a 20 gallon bucket on hand to catch it all. Again, we’re still on the easy part.

The cooler is getting full!
I weighed the sulphur (potassium metabisulphite), mixed it with distilled water and added it to the must. And then, I spent hours measuring the pH and TA and brix, deciding whether to adjust the sugar level or acidity (I decided not to), and preparing to pitch the yeast. And in between, I cleaned out the crusher, the extra buckets, and everything else I used in the process. Not to mention sanitizing everything that came into contact with the must.
I have always used potassium metabisulphite for sanitizing, but now, with my own grapes at stake, I worried a bit. I had used sulphites at 50 ppm to protect the must, and the mix for the sanitizing solution was much stronger than 50ppm. So I decided to go with Star San, an acid-based sanitizer that requires no rinsing afterward. Pretty much every bone in my body was calling for sulphur, but I resisted.
It was some day. We were in the vineyard at about 7 a.m., and it was close to 10 before I pitched the yeast, which started the fermentation (Not right away mind you; no, the yeast played with me, waiting days before they actually began to ferment the must).
Much of the time spent that day involved nothing more than anxiety – wanting to get everything just right and worrying that I was getting everything just wrong – but another part of it was the actual physical labor involved. By the time the day was over, I was exhausted, and the memory of hugging the Vineyard Goddess at the end of the harvest was just that – a distant memory.
Well, I suppose in the end, it’s like dating the first girl you had a crush on – the hopes, the anxiety, the desire to get everything just right, the certainty that you have gotten everything totally wrong, and the physical exhaustion that comes from working so hard.
But I’m hoping this crush is like the time I laid eyes on the Vineyard Goddess for the first time. If this crush is as perfect as that one, we’ll have a wine for the ages.
Preparing for the Harvest – Part II
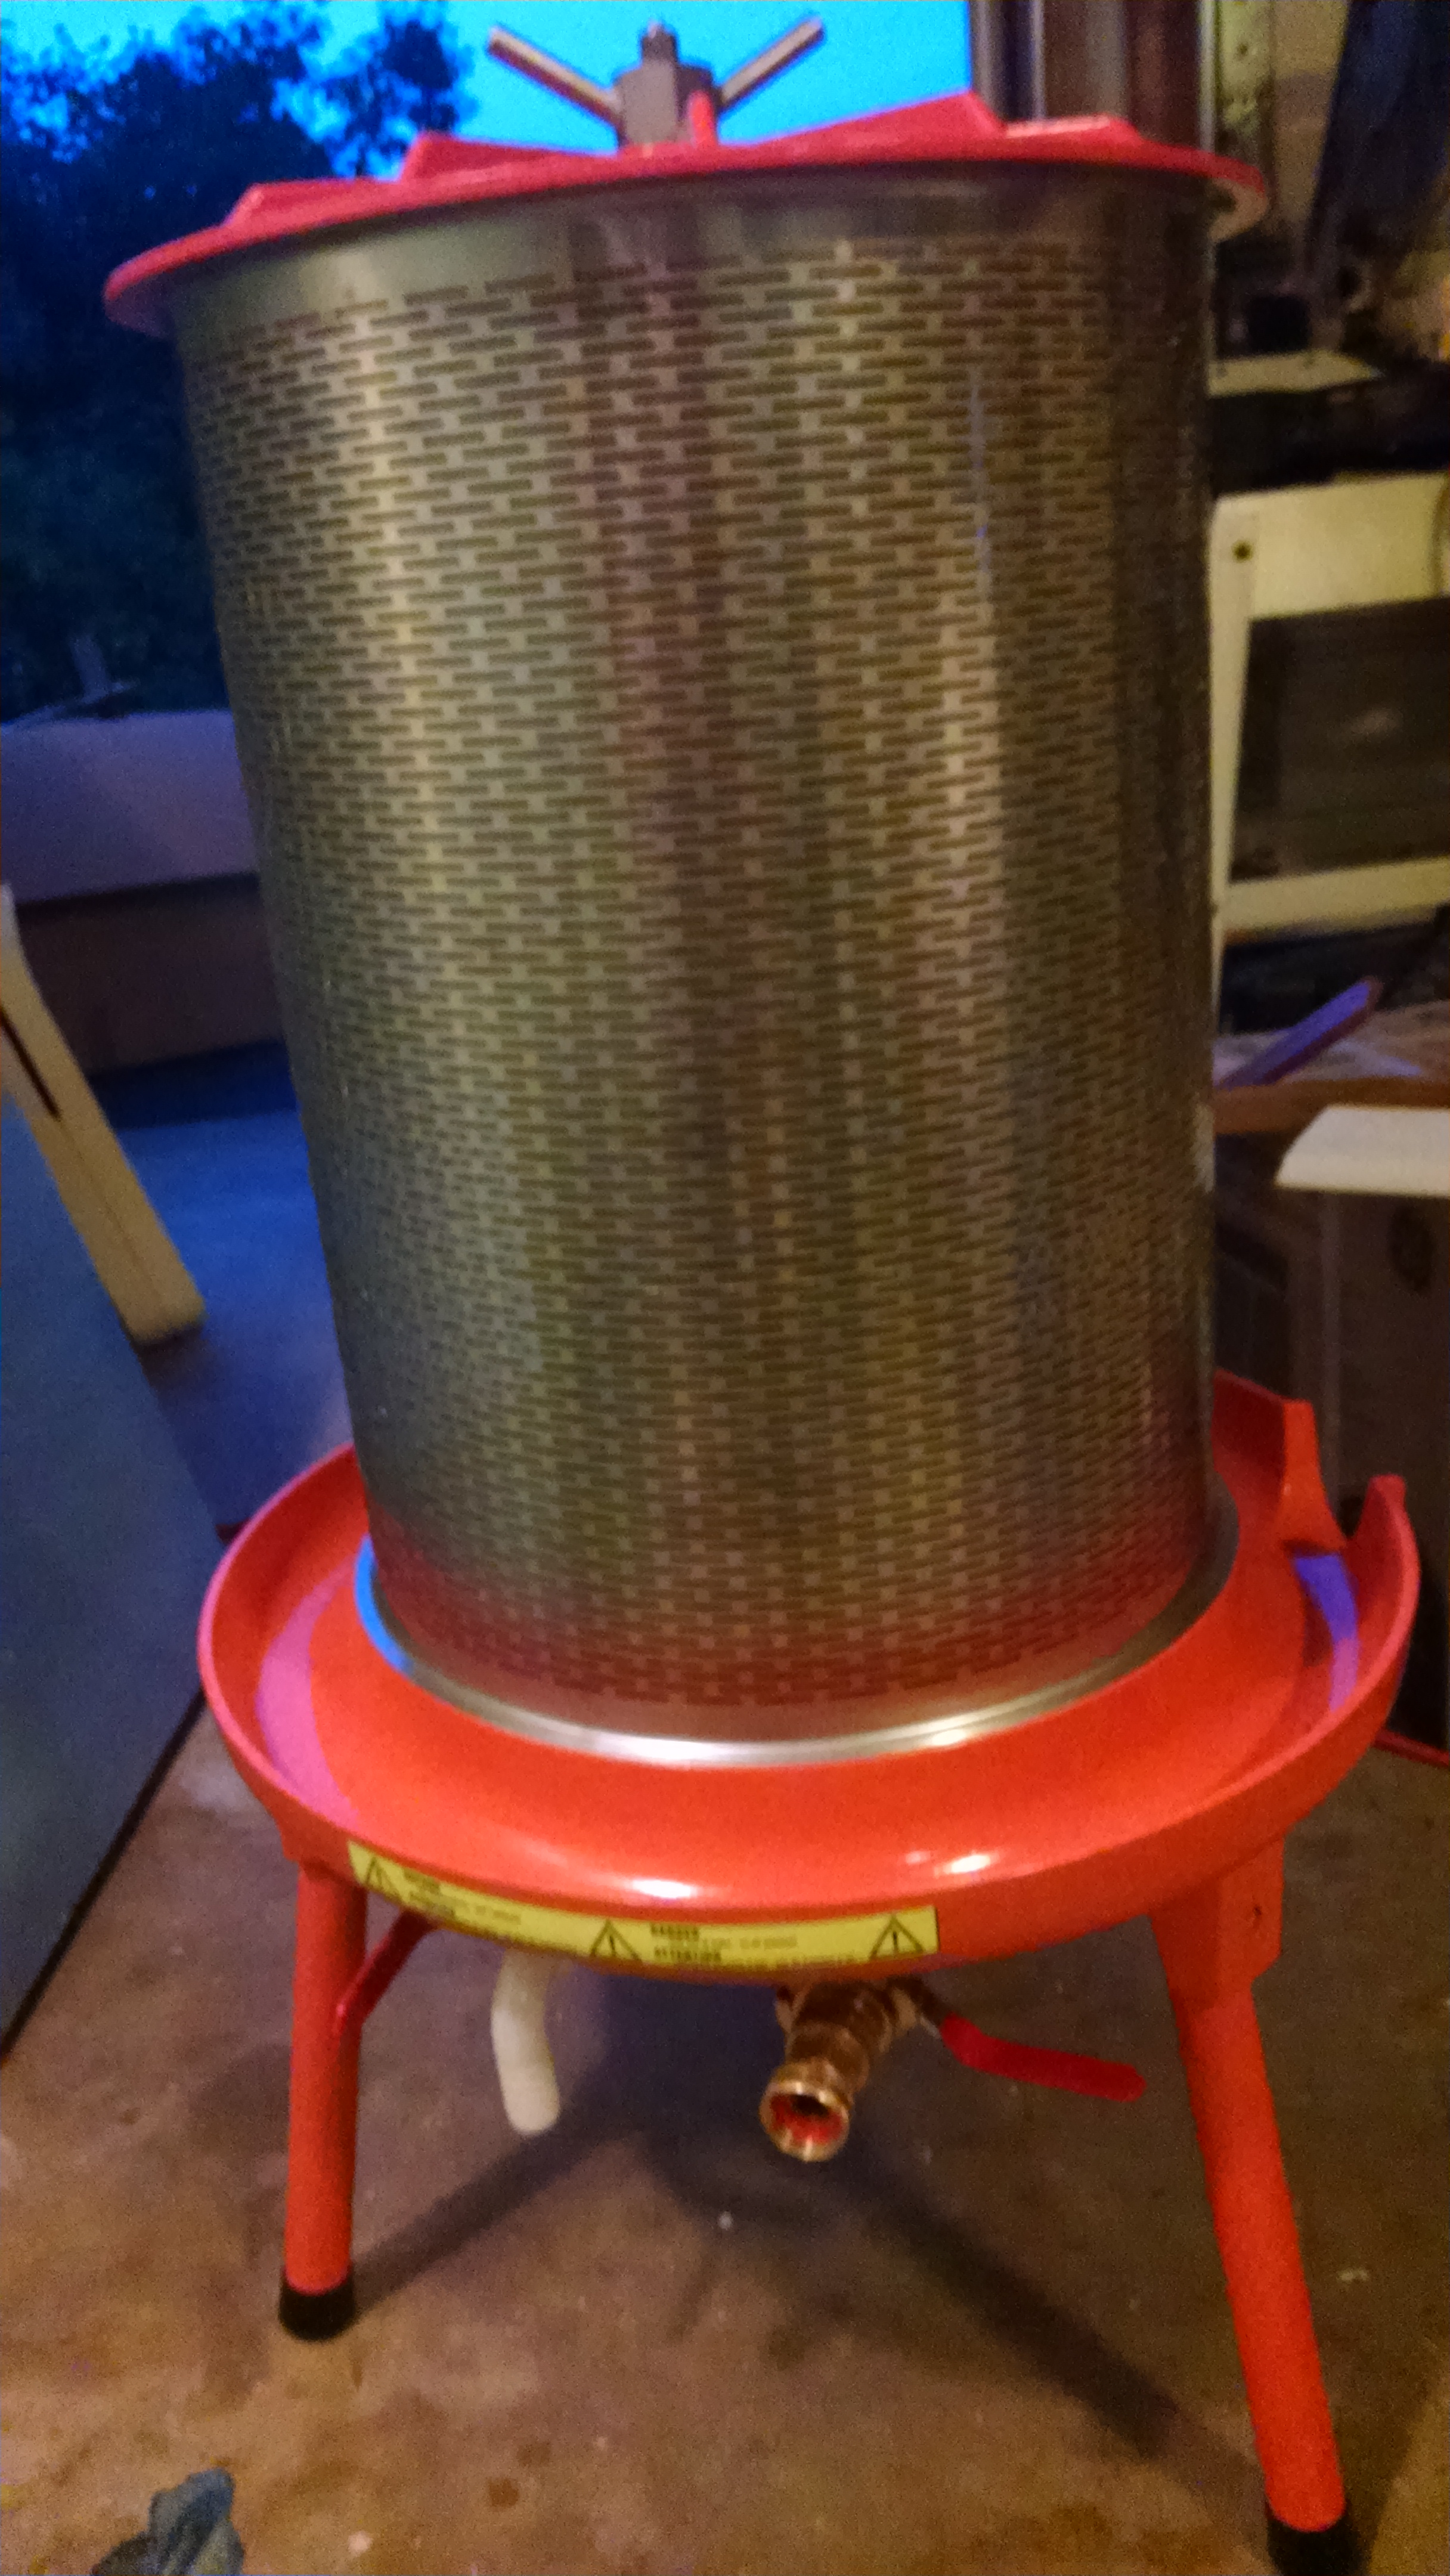
The bladder press is a lovely piece of equipment. below the juice channel, you can see the hook-up for the garden hose.
After three years and more of work and study, we’re close to our first harvest. We started in 2010 with our first classes on viticulture at Piedmont Virginia Community College, and moved on to researching and ordering vines in early 2011. We’ve spent three y ears nursing those vines along, and now some of the varieties – the Viognier especially – are only days away from being ready to pick. (With the rest a bit further behind.) And for all the time we’ve had to think about these things, found myself scrambling in these last few months to make sure I knew what I was doing and had the equipment to do it with.
In some ways, assembling the small items – the yeasts, the beakers, the malolactic bacteria and the like, which I discussed in my last post – was the easiest part of assembling a home winery. Those items mainly required research and an hour or so on the More Wine site. The big items – the crush-destemmer, the bladder press, and the barrel room – though few in number, posed the biggest challenge.
Because they were the most expensive items I ordered, I spent quite a bit of time agonizing over the crusher and press. There are lots of choices at very different price points, and I wanted to order equipment that would be adequate for the task without going overboard.
The crusher destemmer has two tasks. First, it gently crushes the grapes, so that, in the case of reds, they are ready to begin fermentation, and, in the case of whites, they are ready for the press. Second, it separates the stems (which contain bitter tannins) from the grapes. The stems fall out through one side of the crusher-destemmer into a bucket, and the grapes and juice fall into a fermenter.
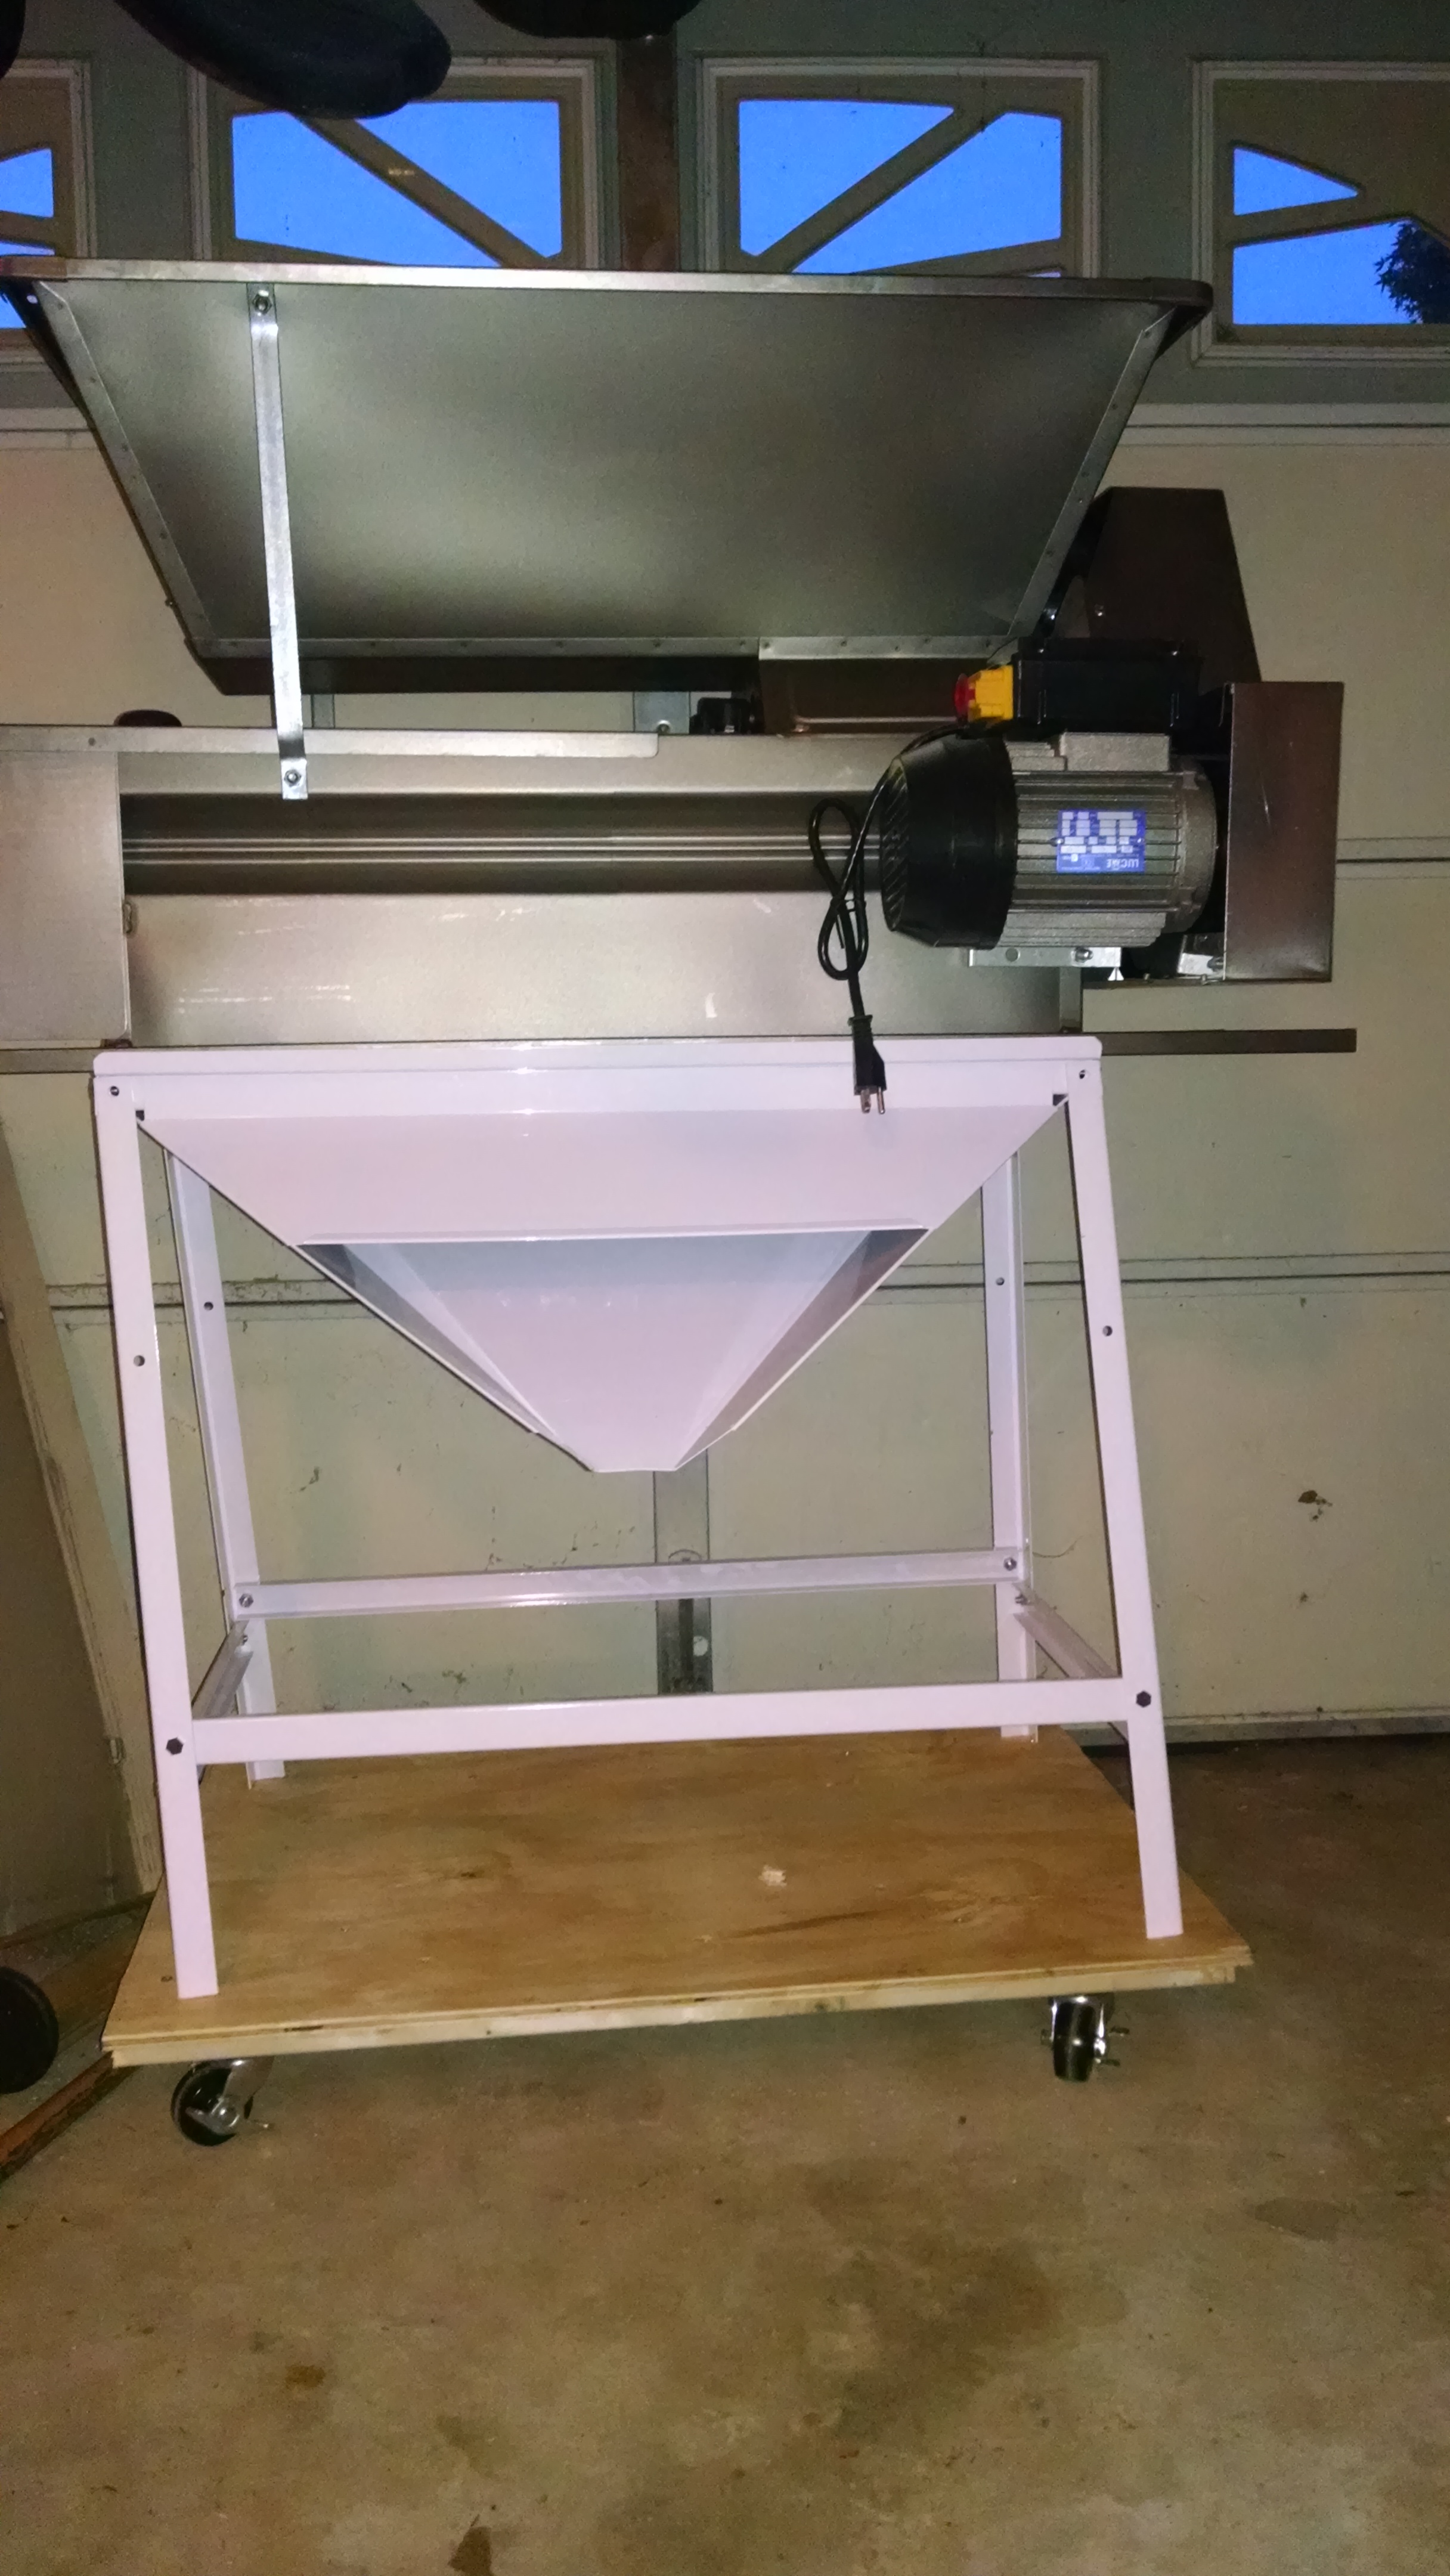
Crusher-destemmr on its stand. I built the wood dolly with plywood, 2×4 lumber and 3 inch wheels.
I would have preferred that it work in the opposite order, first so that there’s no risk of the stems being crushed, and second, so that the two processes could be separated allowing me to destem without crushing if I chose to. But that’s a whole different price range, and all in all, I’m pretty happy with the motorized, stainless-steel machine I purchased. I did wonder briefly if it was overkill for the quantity of grapes I’m likely to be processing, but I tell myself that it’s an investment in the future. Yeah, that’s the ticket, an investment in the future!
I also ordered a bladder press, which is used to press the juice off the skins and seeds of the grapes. The bladder press is pricier than the more traditional-looking basket presses (think wood stave sides and a ratchet handle at the top that is turned to push down a plate to squeeze the grapes), but all of the literature I’ve read suggests the bladder press is a much better choice. The bladder inside the press fills with water from a garden hose to expand gently, pressing the grapes against a screen that lets the juice flow out, while the skins are kept inside. It’s actually quite a beautiful piece of hardware.
After I unpackaged the crusher-destemmer, admired it, let it sit on the shipping pallet for a couple of weeks (it’s really heavy), I came face to face with a small mistake. I hadn’t ordered a stand for it, reasoning that I could use sawhorses or something similar to hold it high enough to let the crushed grapes fall into a fermenter.
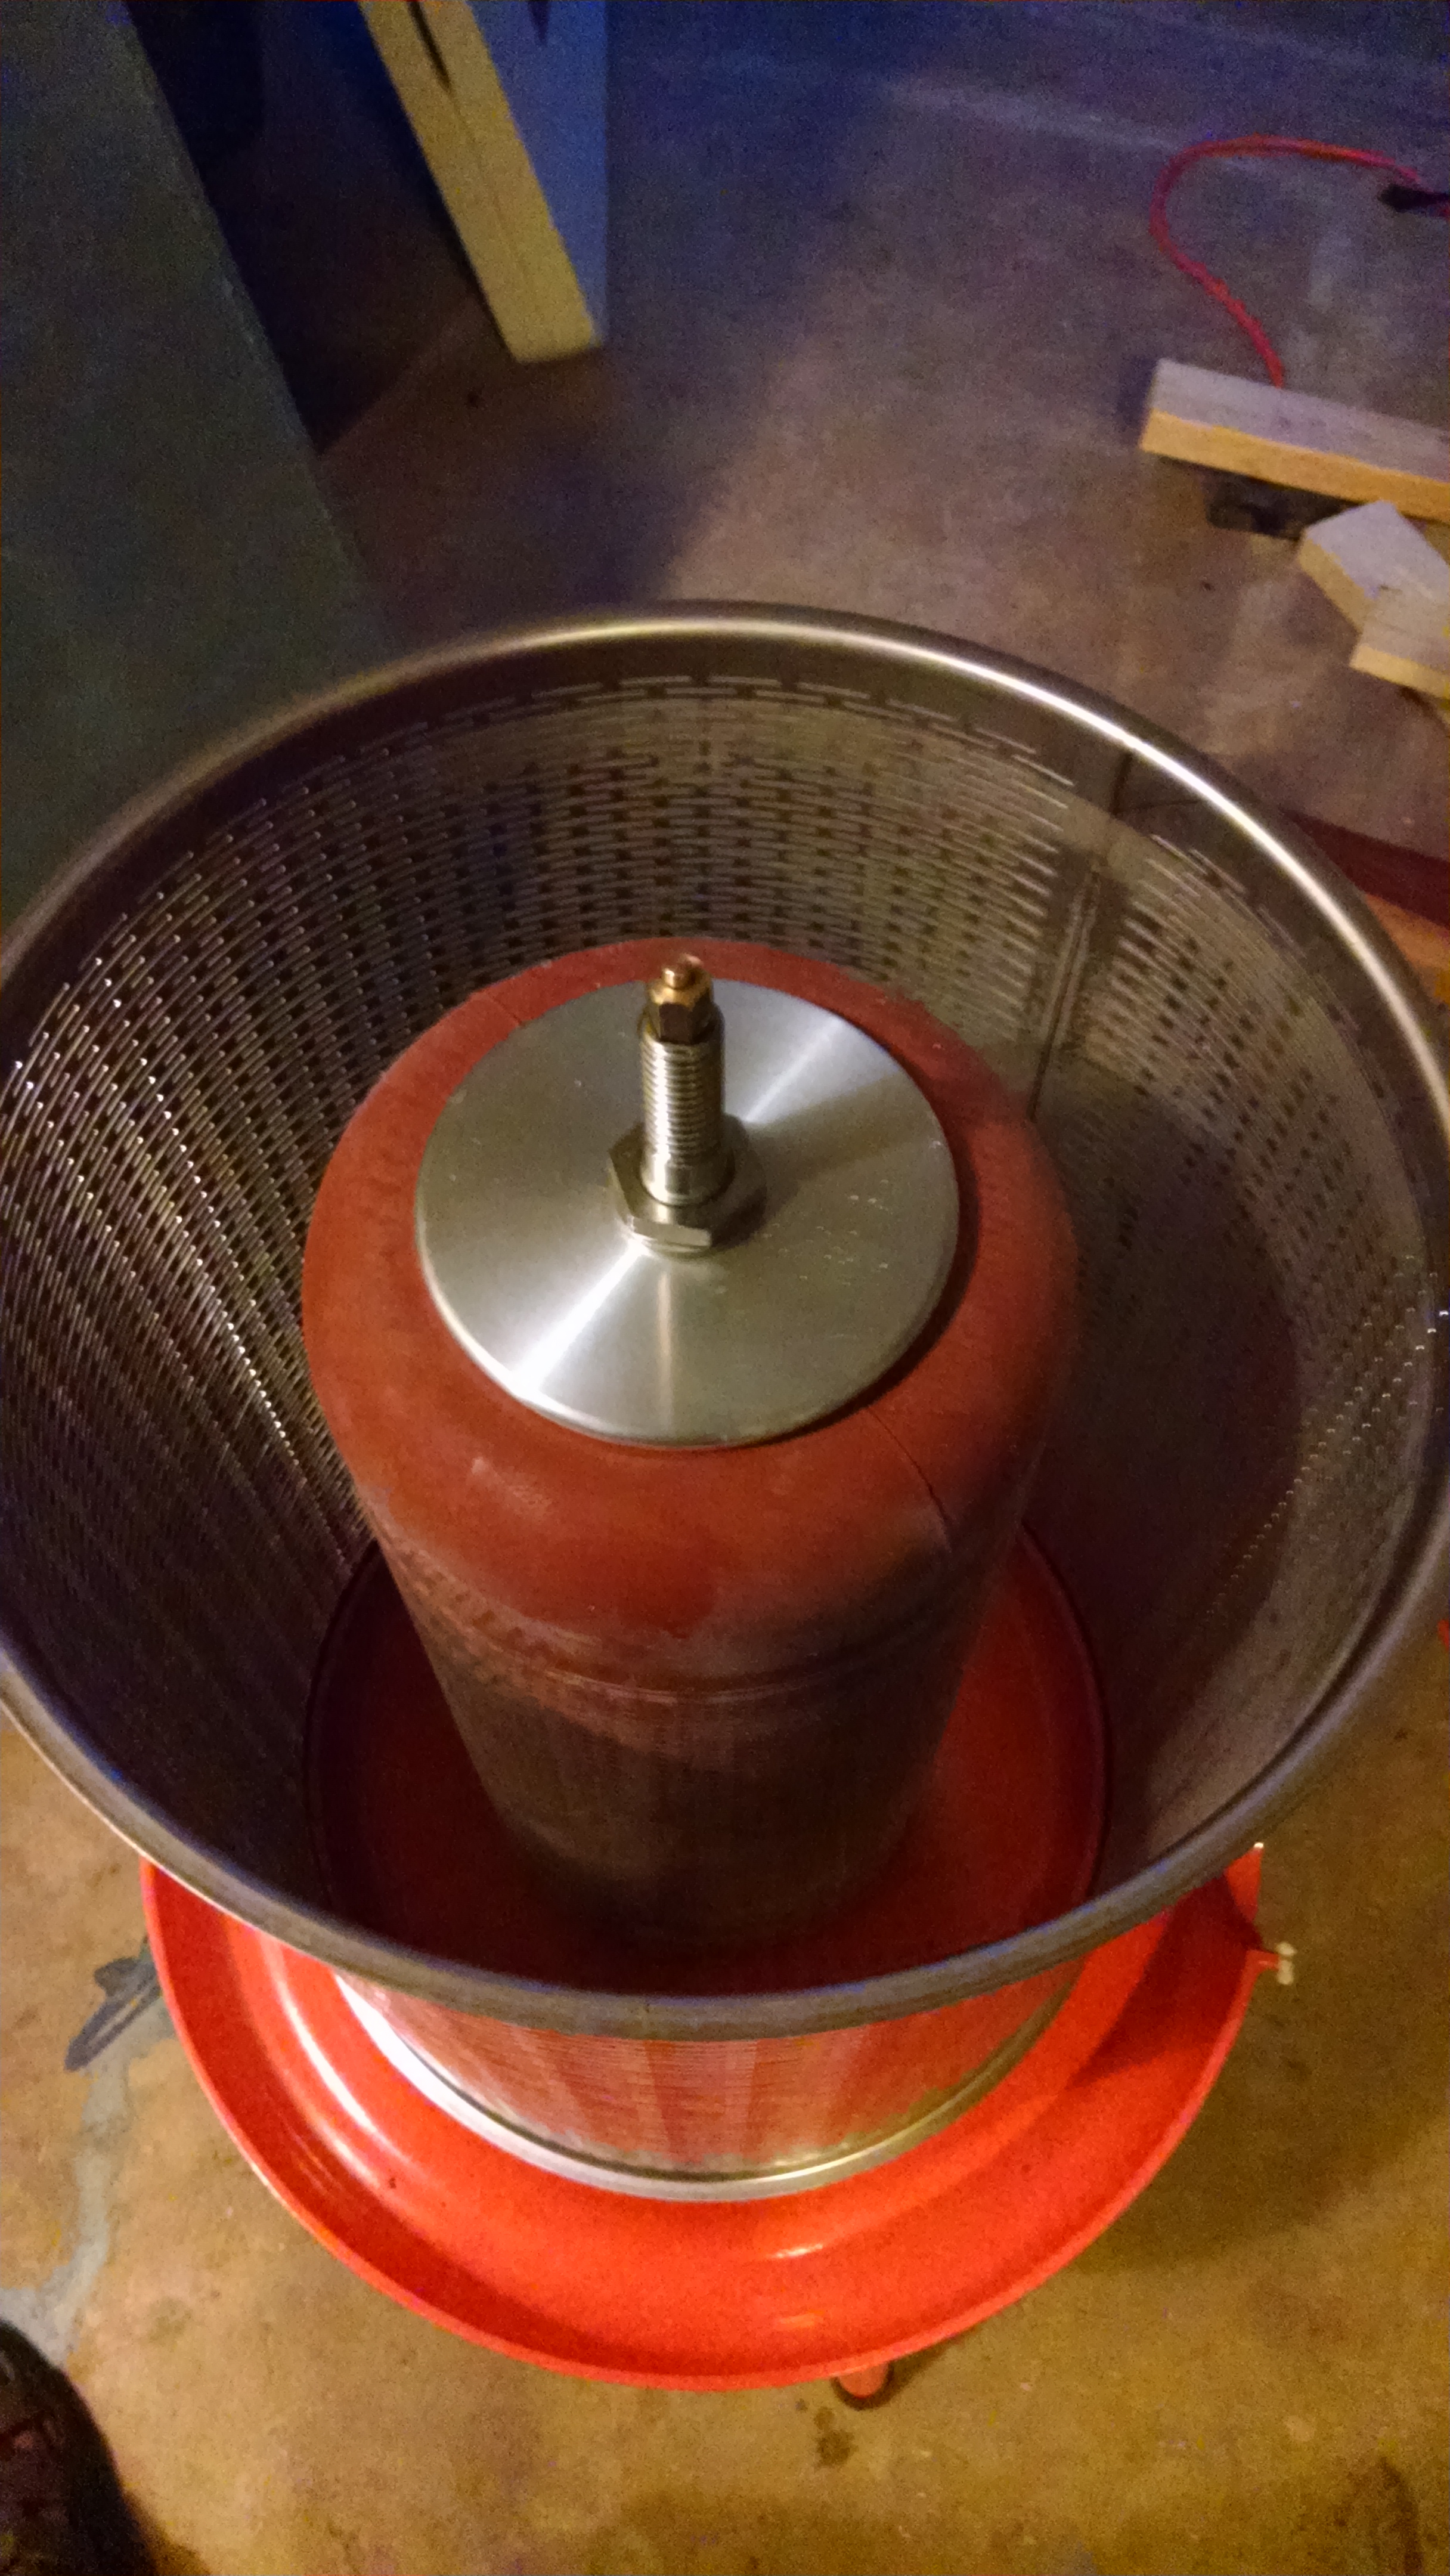
Inside the bladder press – the bladder at the center fills with water and expands to gently squeeze the grapes.
Well, not quite. It turns out the crushed grapes fall through the entire length of the bottom of the crusher, and need to be funneled into some kind of container, either a small fermenter or buckets to carry the grapes to a larger fermenter. So, I turned back to MoreWinemaking, which is where I bought the crusher to see about a stand. It cost $325, which isn’t terrible, but it would have cost nearly as much to ship it, since it has to go by truck. That just seemed wrong, somehow. I had paid one shipping cost for both the crusher and bladder press, and while the shipping was expensive, it was still only a fraction of the cost of the two pieces of equipment. In the case of the stand, I just couldn’t bring myself to pay as much for shipping as for the item itself.
So, I tried other vendors, and the story was the same everywhere, until I stumbled across Carolina Wine Supply. They were willing to ship it UPS or FedEx, unassembled in a flat box, for something like $25. Definitely a company I’ll be doing more business with.
For what it’s worth, having equipment shipped by truck isn’t exactly a trouble-free process. They really want to ship to businesses with loading docks, not to suburban homes, and the cost goes up significantly for the latter. Moreover, they expect you to make arrangements to be there when they arrive, which can be difficult because they don’t always provide much advance warning. I was able to bargain with the trucking company to leave the items on my driveway while I wasn’t home, which worked after a couple of false starts, but it did mean I waived my rights to inspect the items for damage. Well, you work with what you got.
At some point over the summer, I began to wonder where I would store the wine while it was fermenting and aging. Once the initial fermentation is complete, the wine goes into glass carboys for secondary fermentation and, later, for aging. I have quite a number of glass carboys, and it occurred to me that spreading them across the garage wasn’t practical.
A six gallon glass carboy is heavy to begin with, but once full, it weighs an additional 48 pounds, so moving a full carboy around is physically demanding and mentally harrowing. If it slips from your hands and breaks, you end up with a garage full of spilled wine and broken glass. Not good.
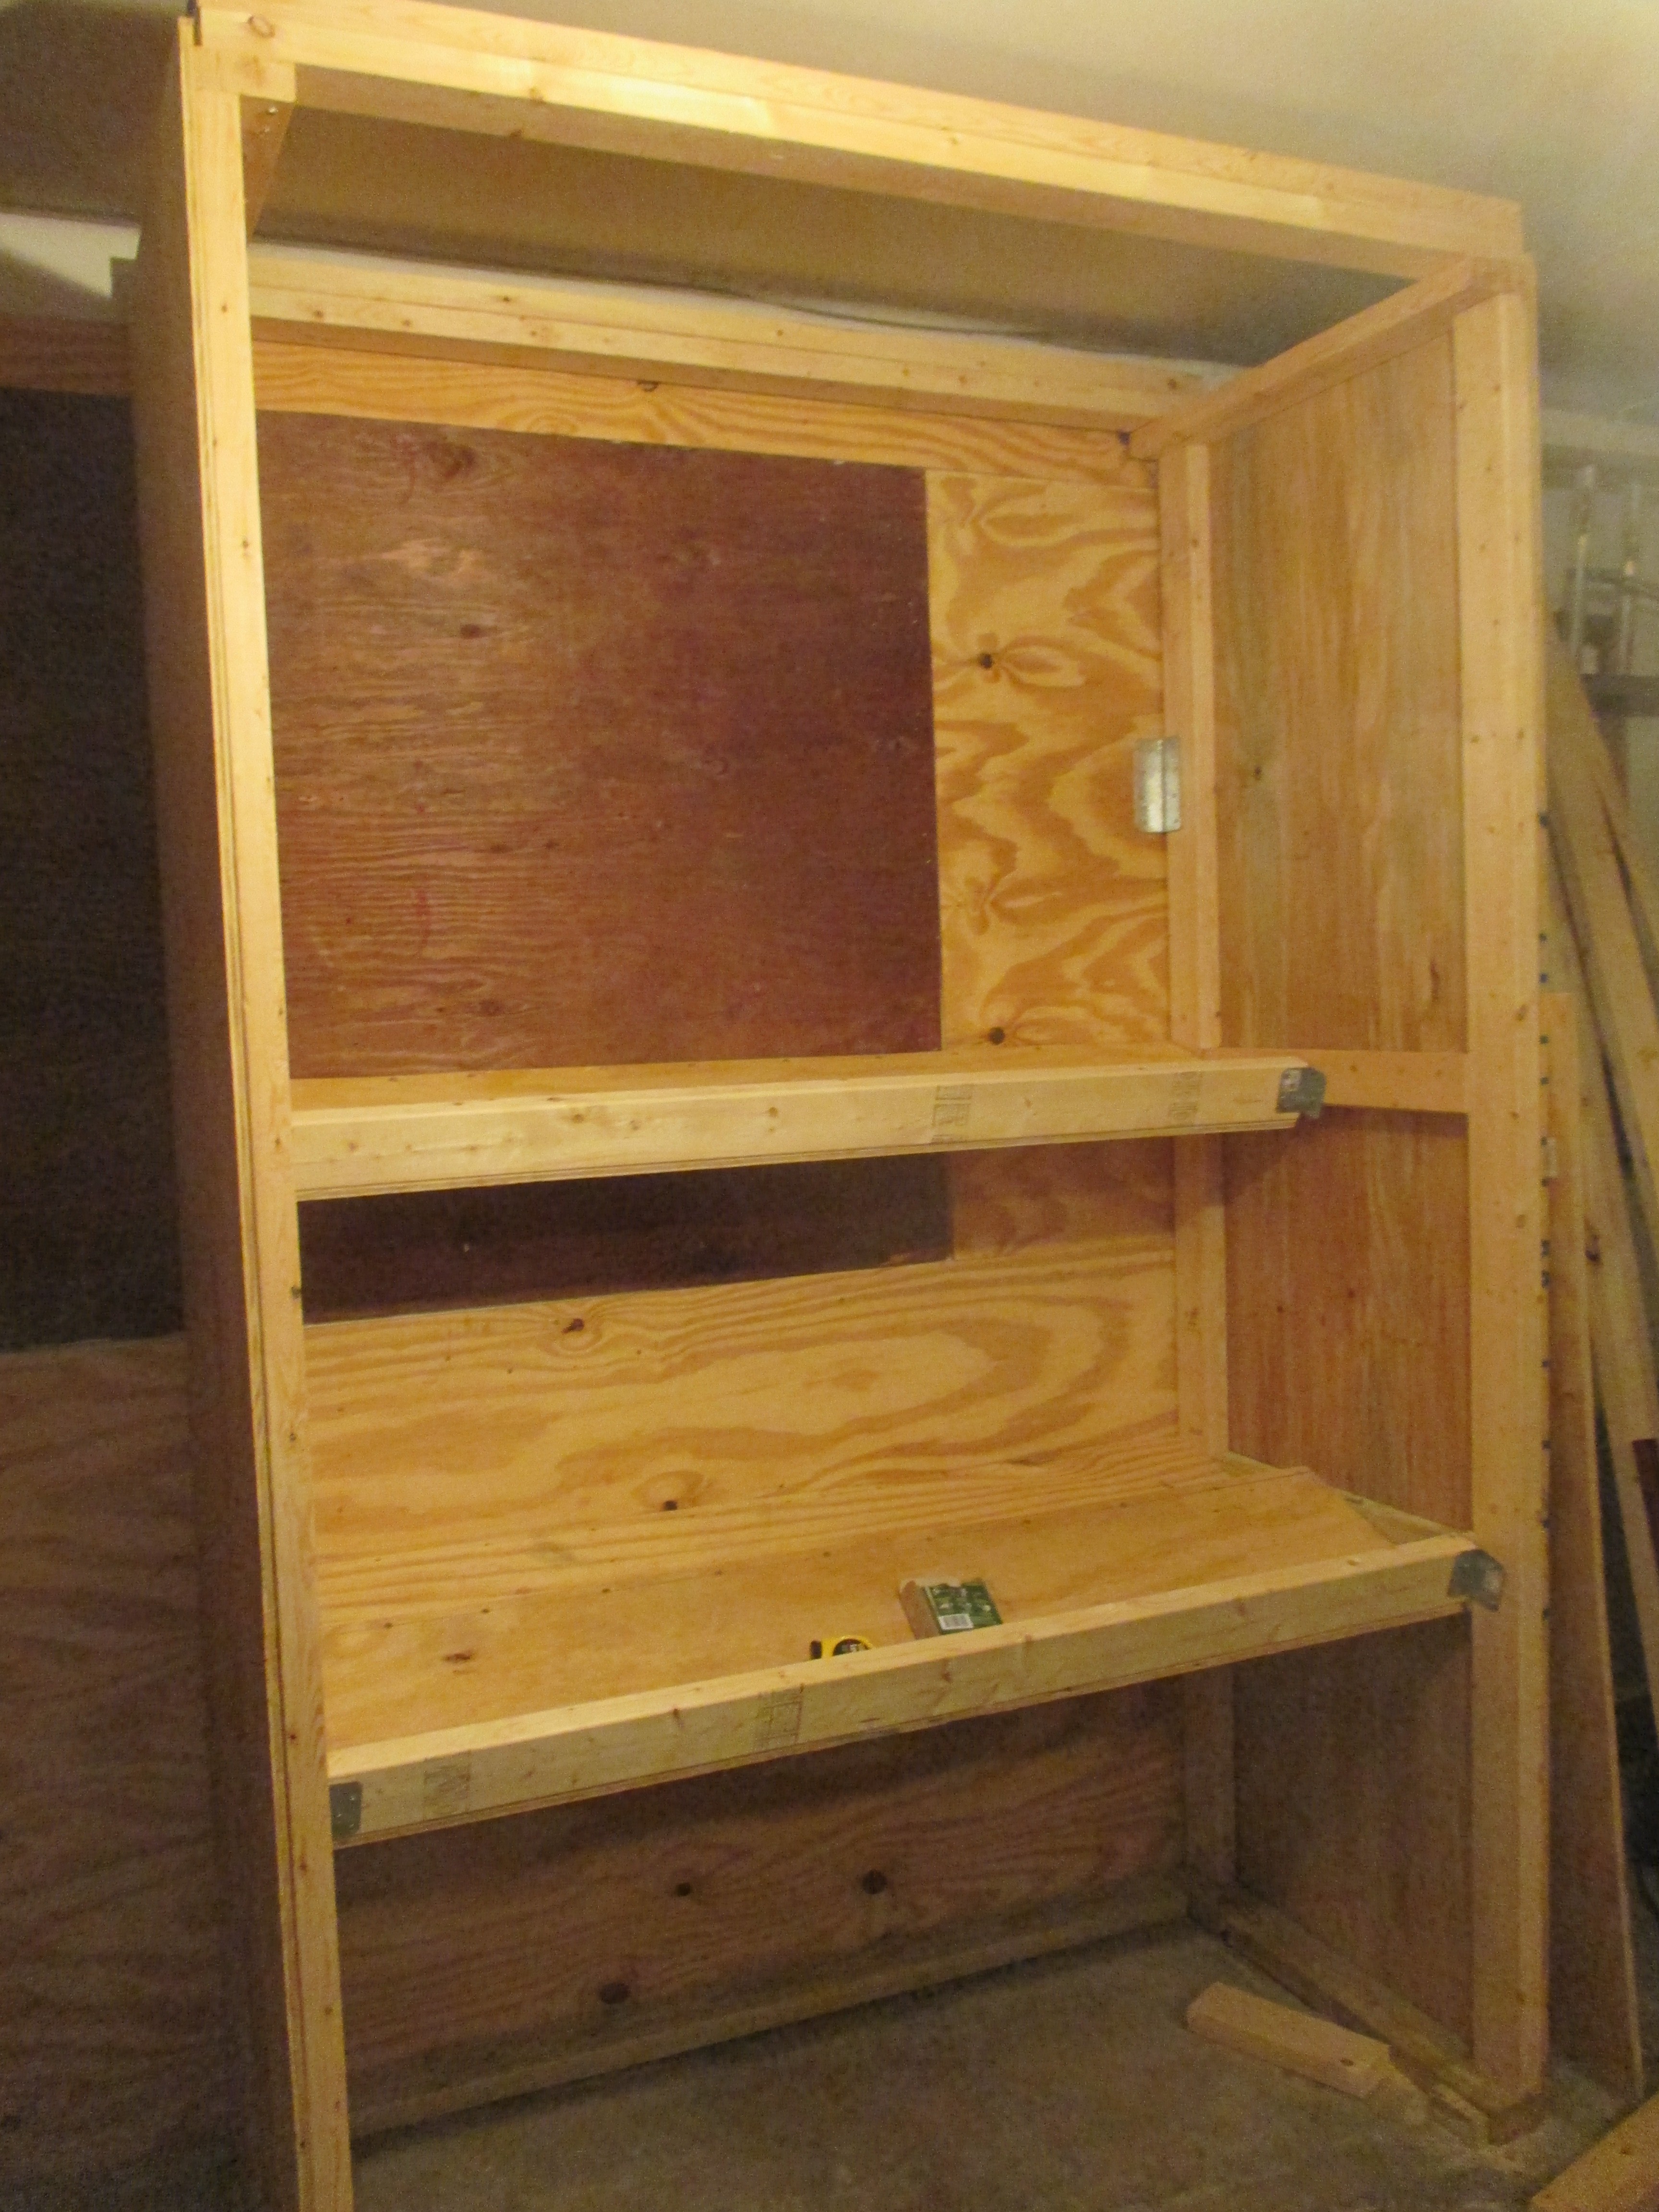
Still under construction, my garage “barrel room” will hold at least 15 six-gallon carboys of wine.
So, I’m constructing a garage “barrel room” that should be large enough to hold 15 six galloncarboys on three shelves, plus either large plastic fermenters, small oak barrels or more carboys on the floor. The shelves are installed at a 15 degree angle, which makes it easier to insert a wine thief or racking cane into the back shelf. By using a pump to move wine, I’ll never have to lift a full carboy.
The very top shelf will hold an assortment of one gallon jugs, supplies etc., and a 5,000 BTU air conditioner mounted near the top will keep it cool inside. I have most of the inside finished, but need to build the doors and mount the air conditioner.
I’m pretty pleased with the way this home “barrel room,” looks, and I have to credit Steve Hughes’ book,The Homebuilt Winery. The book includes the plans, but fair warning, the average person will probably want to spend some time studying and interpreting the plans. I’ve done a lot of home construction projects in my time, and I have a pretty complete workshop, but I still found some parts of these plant to be a chore to figure out. So, while I like the book a lot, I wish it had provided a bit more detail for some of the projects.
However, the idea for the barrel room was worth the cost of the book, and the plans were adequate to get me through the project. The book also gave me the inspiration to build a dolly to move the crusher-destemmer around, and there are a few other projects that I might eventually take on. For the really ambitious, he shows you how to build your own ratchet press and destemmer, and a dozen or so other things. All in all, it’s a book I’d recommend for the aspiring Garagista.
We’re hoping to harvest Viognier in just a few days, though with rain in sight, that may not happen. Hopefully the grapes have another week in them before they start to become over-ripe. I was thinking of picking last week, but the brix (sugar level) was at 21, a few points lower than I wanted. The decision on when to harvest is based on lots of things, including ripenesss and the weather forecast, and you don’t always get the perfect combination. Waiting can be stressful, and it was hard to resist picking those Viognier grapes last week. A friend at a nearby winery counseled me to wait and deal with the stress, adding, “don’t lose your nerve!”
Well, I haven’t. At least not yet!
Preparing for the Harvest
The harvest is here, or at least it’s close. Our Viognier grapes should be ready to harvest next week (I had thought a week ago we’d would have harvested yesterday), and the Merlot and Cab Franc won’t be far behind.
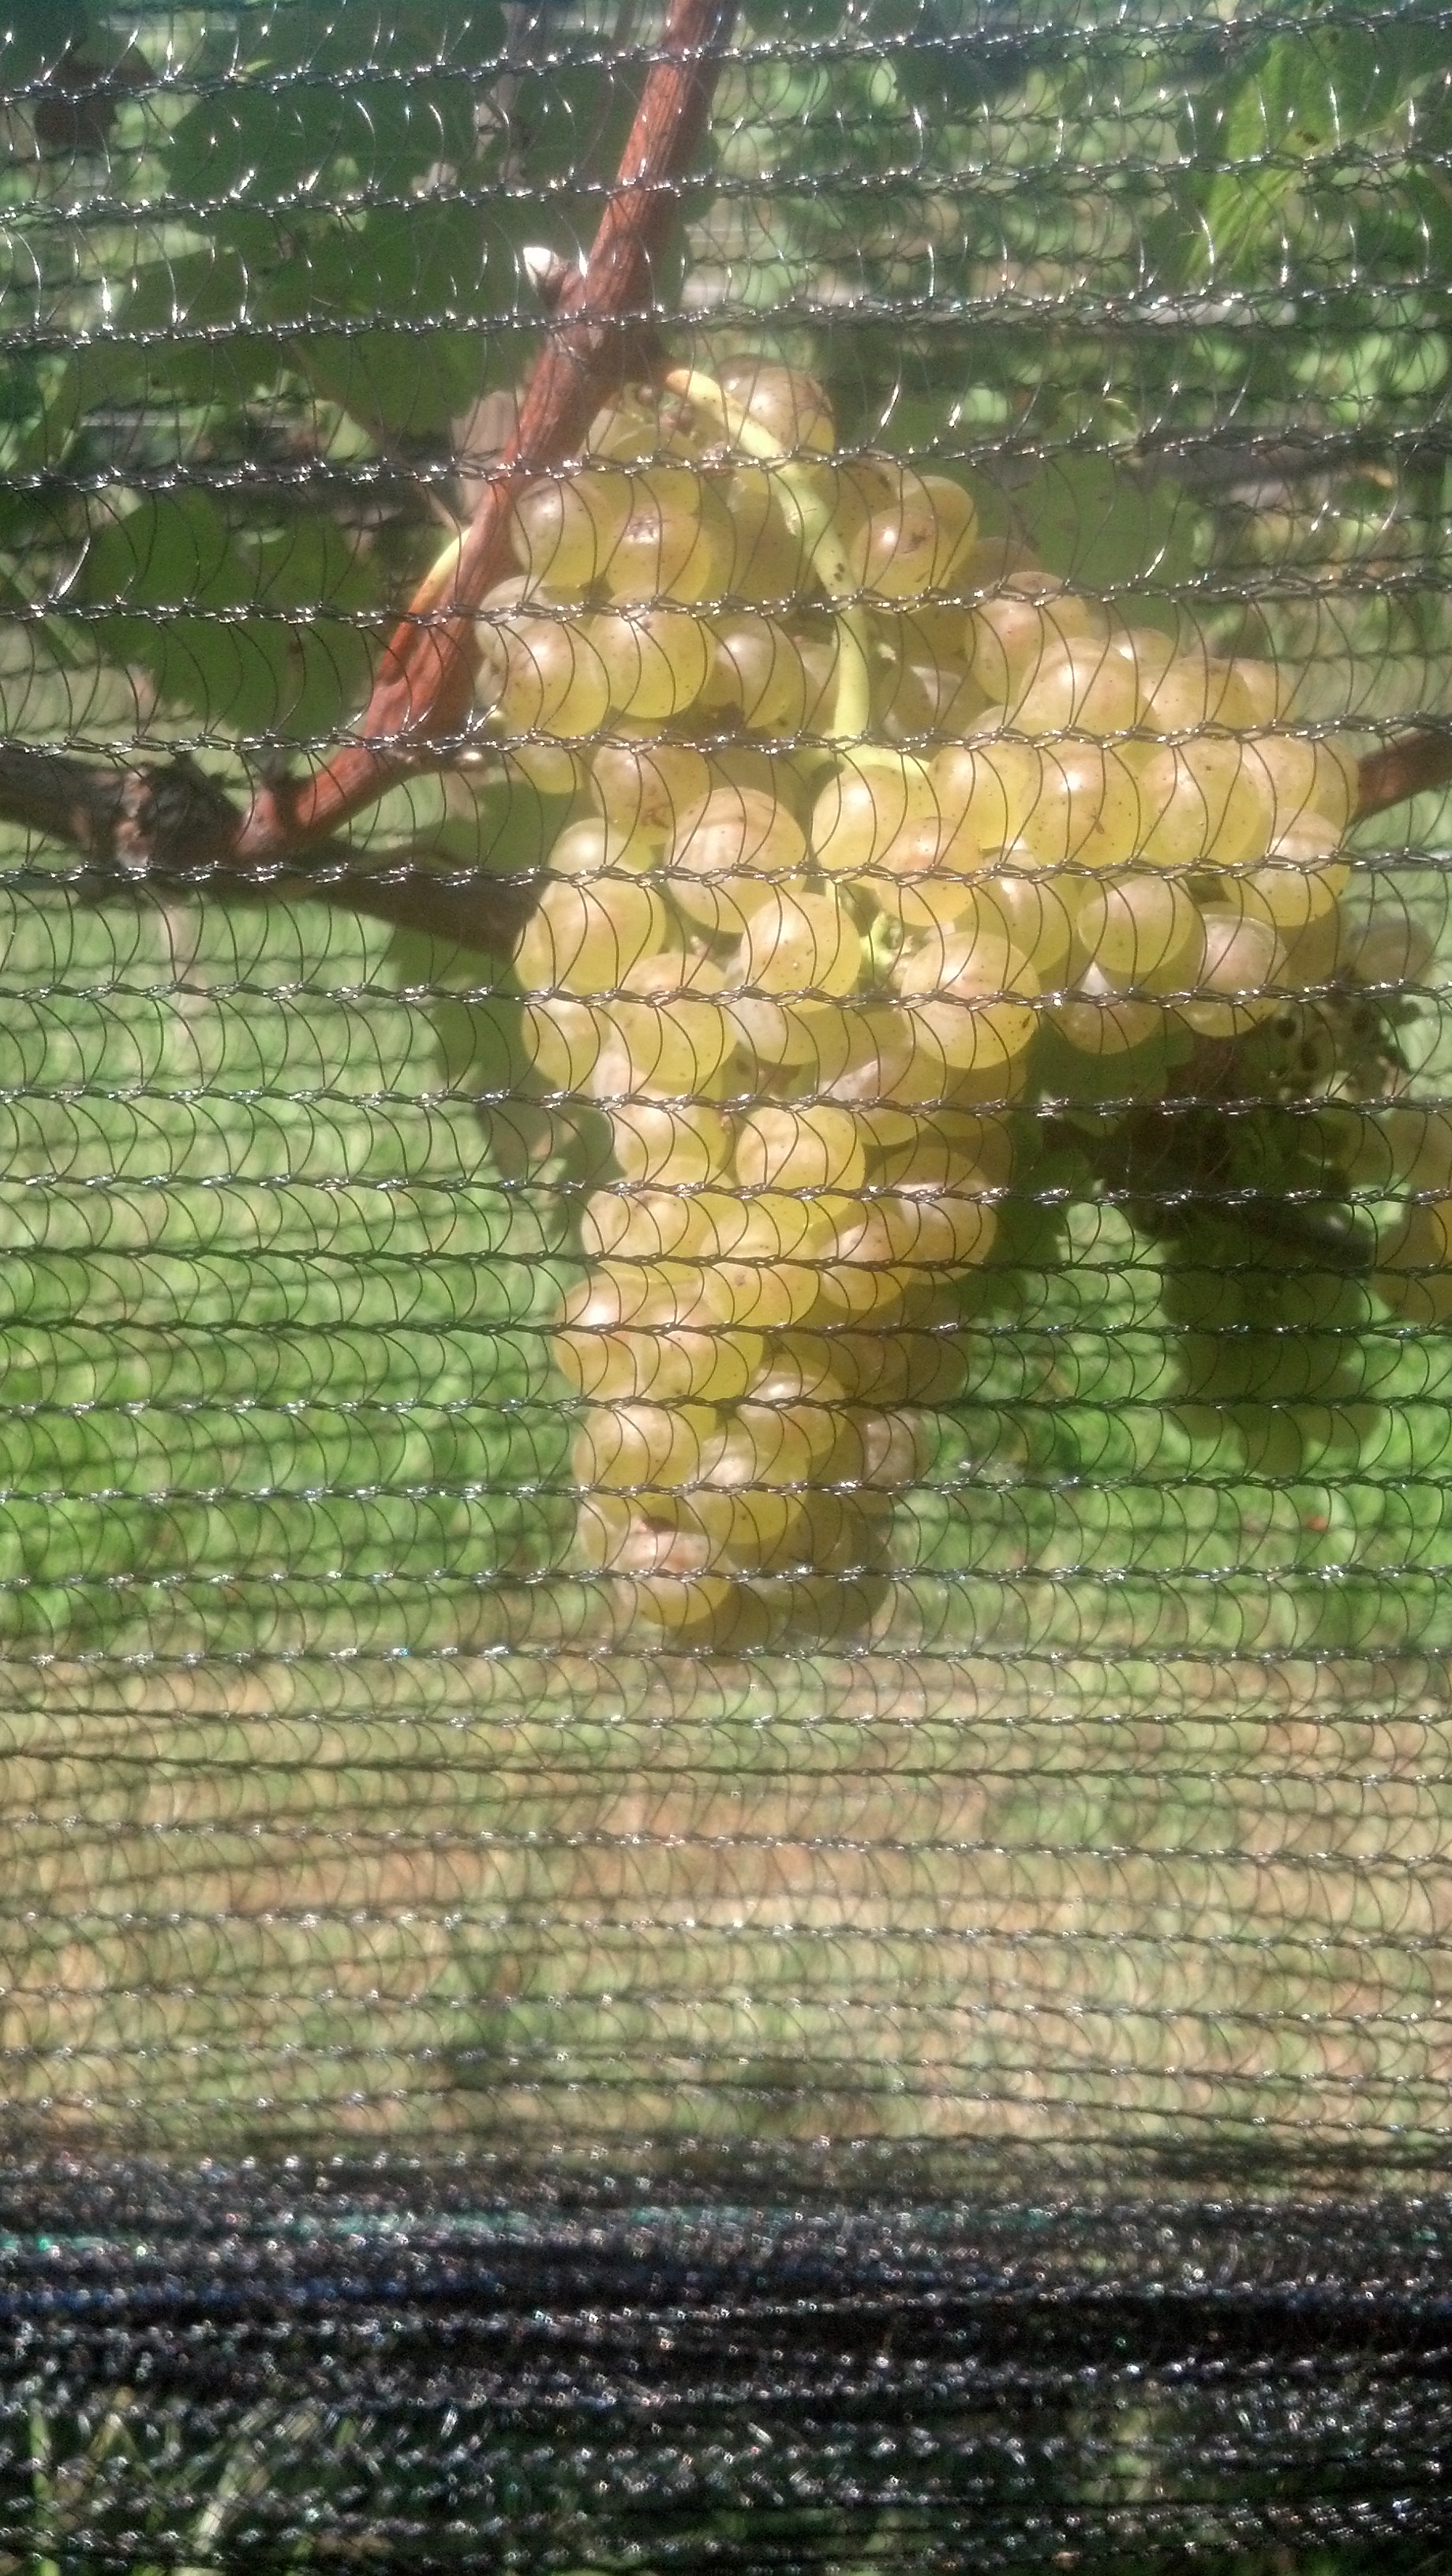
My Viognier at the end of August, partially obscured by bird netting, is looking fabulous
So, I’ve been scrambling over the past month or so to get ready. With a few notable exceptions involving John Updike, virtually all of my reading lately has involved winemaking. And the free time that I haven’t devoted to reading about wine chemistry or winemaking techniques have been spent assembling the equipment and supplies I need to make wine.
And it seems that I need a lot. I think the average cost of a bottle of wine from this vintage will approach the price of a bottle of Chateau d’Yquem. There’s a part of me that wonders if it wouldn’t have been smarter to have spent all that money buying someone else’s wine. But really, where’s the fun in that?
The learning curve has been pretty steep, and I’ve made a bunch of mistakes — even though I have yet to harvest my first grape. After learning all about free and bound SO2, pH, fining and a hundred other things, I realized I was all but clueless on a number of practical matters, such as which yeast to use for each grape variety. For hobbyists like me who are buying yeast in quantities of 50 to 80 grams at a time, the options are more limited than they are for commercial wineries that are turning out tens of thousands of cases of wine. But that’s a relative thing. There are still 40 or 50 different yeasts available in small quantities from companies like More Wine and Midwest Supplies.
I still remember a class at King Family Vineyards where winemaker Matthieu Finot invited us to taste wines from three different barrels. They were all distinctly different, and I was truly surprised when Matthieu told us that they were all made from the same grape variety from the same vineyard bloc and vintage, and that the only difference was the strain of yeast he had used. Clearly, yeast matters!
The Vineyard Goddess and I went to a lot of trouble to pick what we thought were exactly the right clones for each of the grapes we planted – and some of the clones we wanted were not easy to get – and the right root stock as well. So, it only made sense that we should go to the same lengths to get the right yeast. After lots of reading and lots of anxiety, I selected Rhone 4600 for my Viognier (and I think also for the Petit Manseng), Bordeaux Red (BDX) for the Petit Verdot, MT for the Merlot, and BM4x4 for the Cab Franc. And then, on reflection, I ordered something called BA 11 for the Viognier, even though I already had the Rhome 4600. Here’s the writeup on More Wine‘s web site for the BA 11:
BA11 was selected in 1997 near Estacao Vitivinicola de Barraida in Portugal. It has excellent fermentation kinetics, even at low temperatures. It promotes clean, aromatic, estery characteristics during fermentation. BA11 intensifies mouthfeel and augments lingering flavors in both still and sparkling white wines. BA11 encourages the fresh fruit aromas of orange blossom, pineapple and apricot. In relatively neutral white varieties BA11 brings out tropical fruit, cream, vanilla and spice. With fruit from hot climates, BA11 can really help to “flesh out” a wine by its’ volume and mouthfeel enhancement. This strain is good by itself, as well as being a great structural component to a blend. Best results from 50 to 77 degrees F, and alcohol tolerant to 16%.
Sounds pretty good, right? Well, for now. I’ll probably wait until I’m running the crusher before I settle on the yeast. Oh, and I still haven’t decided which yeast strain to use for the Petit Manseng. Maybe the Rhone 4600? Well, I was feeling pretty good about the future of my wine when I realized I hadn’t yet ordered malolactic bacteria, the stuff that converts tart malic acid to softer lactic acid, generally just in red wine. Not to worry. I went back to the More Wine site, did some research, and ordered enough ML bacteria to soften an ocean of malic acid. Well, maybe not an ocean. But at least the dozens or so (yes, I am an optimist) gallons of red wine I will be producing this year. It turns out that ML bacteria packages, once opened, can’t be saved. So for each of the three reds I’ll be making, I had to order separate batches of ML bacteria, at about $33 a pop.
I’ve ordered a half-dozen glass carboys and an array of other equipment.
And that’s barely scratching the surface of the purchases I’ve made in the past few months. I’ve accumulated lots of lab equipment, including an instrument that measures pH, sulfur dioxide, and titratable acidity. I bought a high-precision scale, an assortment of flasks, beakers, air-locks and stoppers, and four new plastic fermenters: two that can hold ten gallons of must and two that can hold 20 gallons. I already have a number of 7.9 and 6 gallon fermenters, so I’m feeling ready for a harvest of almost any size. And I’m really praying that I can actually fill at least one of the 20 gallon tanks.
There are also a few additives that are necessary, and some that are not, strictly speaking, necessary, but are helpful enough that I’ll probably try them out. In the can’t-do-without category are yeast foods. There are a few different ones available, both for mixing with the yeast when it’s being prepared for inoculation and for helping the fermentation along in the days that follow, but I settled on Go Ferm and Fermaid K.
Other additives include Tartaric Acid for making adjustments in the acidity of the must, Albumex Bentonite and other fining agents, and oak cubes, which substitute for the oak barrels that I don’t have. I could go on about additives, but I’ll stop here for now. In the next post, I’ll cover the big items, such as the crusher-destemmer and the construction of my garage “barrel room.” For now, though, I’ll close with a short list of the books and online publications I’ve found most useful.
First, I can’t say enough about the folks at MoreWine. In addition to all the stuff they’ll sell you — and they have a well-organized site that includes quality equipment and ingredients at reasonable prices with lots of information — they have a series of free booklets and guides that I would probably have been willing to pay for. The guides to red and white winemaking run nearly 100 pages each, and are full of practical information. In addition, they have guides to SO2, the use of inert gas, bench trials and a number of other subjects. After reading a bunch of other books, I found these manuals provided the down-to-earth practical information I needed to go from the vineyard to the bottle.
David Bird’s Understanding Wine Technology was also quite useful. It provides a good overview of almost every imaginable topic in winemaking, and gets into considerable detail. If you’re wondering how yeast works its magic or what carbonic maceration does, this is a great book. It isn’t the practical, down-to-earth kind of manual that MoreWinemaking provides, but it includes a wealth of information and it’s a joy to read.
David Pambianchi’s Techniques in Home Winemaking is probably the most detailed and thorough book on subjects of interest to home winemakers that I have ever encountered. This is a book that I have perused, rather than read, but I’ve used it to get loads of technical details on topics of interest. I’m thinking it’s a must-have for any home winemaker.
One of my favorite books on viticulture and winemaking is Authentic Wine by Jamie Goode and Sam Harrop. Split roughly in half between the two subjects, this book helped me understand what kind of winemaker I wanted to be. It covers lots of important subjects, like Brettanoymyces and free vs. bound SO2, but it also gets into some of the philosophical issues, like how much intervention in the cellar is okay.
The very first book I read, some four years ago, was Jim Law’s The Backyard Vintner. It doesn’t go into great depth on any subject, but it provides a more than adequate overview of all the important topics in viticulture and winemaking in very accessible prose. Jim Law owns Linden Vineyards, one of Virginia’s great wineries, and the articles on the Linden web site are also well worth reading. (And while you’re at it, check out Jim’s articles in the last two issues of Grape Press, the publication of the Virginia Vineyard Association, as well as an article in the next issue, which should be out by the end of September.)
And finally, the second book I read, just after Jim’s book, was Jeff Cox’s, From Vines to Wines. This is an excellent guide that covers everything from planting your vines to bottling the wine. If you’re not sure how to prune second year vines or how to rehydrate yeast, this book has everything you need.
There are many more books, I’m sure – I actually have a couple sitting on my shelf that I haven’t yet begun to read – on the subject of winemaking, but these should be enough to get anyone started. I wouldn’t say they’re a substitute for classes or hands-on experience, but they’re certainly an important supplement. God knows, I’ve found them invaluable.
Tempranillo, Part IV: Wine Faults and Me
It’s been about a year since I bottled my Tempranillo, and so I thought it was time to give it a try. This is a wine I had great hopes for: I had participated in a tasting at WineMaker magazine’s conference last year, and the wine had received reviews that ranged from the merely positive to almost glowing. And it had been in the bottle for only 35 days – hardly over bottle shock.

Tasting at the WineMaker magazine conference. My bottle is the one in the foreground with no label.
So you can imagine my surprise when, almost immediately after opening the bottle, I detected an odor – not an aroma, mind you, but an odor. I thought perhaps that it was just one of those things – a little, well, I don’t know what. I just thought it would pass.
It didn’t.
I poured the wine, swirled it vigorously, and sniffed. It stunk.
And then I swirled the glass much longer and even more vigorously, and sniffed again. It still stunk.
Well, I thought, perhaps it’s one of those wines with barnyard or some such aromas but wonderful tastes. I think there are such things. Well, actually, I have no idea. I was just hoping.
But if there are such things, they didn’t account for this bottle’s problems. It tasted just awful. I suppose that if I were a still a college student, more interested in the alcohol content than the aromas and taste of the wine, I could have choked it down. I’m sure I drank much worse in those days. (Remember Ripple? Boone’s Farm?)
But today? No, no way. I would say that in an even more emphatic way, but this is a family friendly blog and such language is not permitted.
I can’t begin to tell you how depressed I was beginning to feel. This was my prize wine, the star of all the wines I have made, and I had outrageously outsized expectations for it. And yet, the evidence was clear. It stunk.
That was especially bad news now, since I’m getting ready for our first grape harvest in a couple of months. If my very best effort with a kit wine had turned out so badly, how could I possibly expect to do well with fresh fruit, which is a much more complicated process.
I decided I would give the bottle another day, so I set it aside and opened a California Pinot Noir to drink instead.
The next night, I opened the Tempranillo again, more in fear than anticipation, and quickly realized my instincts were right. It still stunk. Probably as much as the first night, maybe more. Now I was really depressed.
But a day later, on the way into work, I suddenly realized that I recognized that bottle’s foul smell. TCA taint. The wine was corked. I was sure of it.
A corked bottle is one that has been tainted by 2,4,6-Trichloroanisole, or TCA for short. It’s usually described as smelling like a damp basement or wet socks left too long in the hamper. Over the years, I’ve read that something like one to five bottles out of every hundred suffer from TCA taint. I actually find that hard to believe, since I rarely encounter one. In fact, I have to say that the only reason I recognized this flaw as TCA taint is because I took a class last year on wine faults and had an opportunity to sniff and taste a corked wine.
Even so, I clearly wasn’t prepared to believe that a wine I had made and bottled could possibly be corked. The idea hadn’t even entered my head.

A tale of two bottles. They came out of the same tank, made in exactly the same way, but one was a joy to drink, and the other sucked!
But this evening, energized by this flash of insight, I pulled out another bottle of the same Tempranillo to taste. I have to say, I was a bit concerned – clearly, my bottling technique could use some work because there was at least an extra inch of air in the neck of the bottle. Well, that’s why I’m working with kits: trying to get all the mistakes out of my system.
Opening the new bottle, I was prepared for the worst. But after pulling the cork, I sniffed the wine from the bottle and was thrilled – no sign of TCA! I poured a half-glass, swirled, sniffed and was elated. The wine was definitely not corked. But was it good?
I tasted it, and wanted to shout. Yes, indeed, it was good. Soft tannins, big fruit, nice acidity. I’m guessing that Robert Parker won’t be including it in the next issue of the Wine Advocate, but whether it warrants a score of 92 or 82, it was good – a lovely, drinkable wine.
So, I’m somewhat more confident about my prospects as a winemaker. And, as a bonus, I have another two cases of good wine that I don’t have to pour down the drain.
A final word. I think everyone who loves wine should feel comfortable returning a bottle and telling a waiter at a restaurant or the manager at a wine store that the wine is flawed. I’ve done this perhaps a half-dozen times in my life. And at Total Wines, for example, they never bat an eye. They take the bottle and invite me to get another. And I suppose they would offer me a refund, but I’ve never asked. It seems more fair to get another bottle of the same wine.
And that’s the point. If you buy a wine, you should be prepared to deal with it. If you decide it’s not to your taste, ok, you won’t be buying it again. But you shouldn’t think you’re entitle to a refund because you like soft tannins and the wine you bought needs a couple of years in the cellar. Or because you bought a white that was aged in oak and you suddenly realize that you prefer whites aged in stainless.
But a genuine fault is different. If the wine is corked or oxidized, if it has severe Brettanomyces, then you should feel comfortable in sending in back. It’s not always an easy call. It took me two days to realize my wine was corked. And Brettanomyces? Well, that’s a touchy subject. A little can add some character, more than that can ruin the wine.
So, I guess the best advice I can offer is to trust your instincts, but be reasonable. And over time, if you taste enough wine, you’ll learn to recognize common wine faults. Which, thank God, are few and far between these days.
Tempranillo, Part III
On the eve of our departure for WineMaker magazine’s annual conference, hosted in Monterrey, California, this year, I expressed some regret to the Vineyard Goddess that I didn’t have a bottle of home-made wine to take with me for one of the tasting events. I had bottled my Tempranillo some 35 days earlier, and while it was just past the bottle shock stage, I had not yet tasted it (and it was way too late to try it that night). For all I knew, it was plonk.
My bottle is the one in the foreground with no label.
“Take it anyhow,” the VG told me. “Take two bottles. We can taste one on the first part of the trip, and if it’s good, you can take the other one to the tasting.”
Sage advice. I packed two, using my newly minted method of wrapping the bottles in bubble wrap (replacing my old method of wrapping them in t-shirts), and told myself we’d taste the first bottle when we arrived in Sedona on the first leg of our journey. As it turned out, I didn’t get to it until we reached the Grand Canyon for the second leg of the trip.
And what a surprise! It wasn’t the vintage of the century, but it was definitely good. I knew I had made some mistakes in the process, especially in the area of temperature control (overheating it at some points, and not keeping it warm enough at others), but it was still a good, solid drinkable wine. So, I felt confident that I could hold my own with the other winemakers, or at least not get ridden out of town on a rail.
The comments were generally favorable. The 100 or so winemakers who gathered for the tasting were seated at round tables of 10, and half the table rotated every ten minutes to be paired with new tasting partners. We tasted each other’s wine and provided feedback. I’d like to say that everyone was totally, if not brutally, honest, but I suspect we were more diplomatic than candid.
So, here are some of the comments:
“Young, but very hearty. As it ages, it will become a very nice wine.” (Oh, yeah, as it ages — someday it will be a decent wine!)
“Good tannins, good acidity, nicely balanced.”
“Good color, very dry. Nice tannins and structure.”
“Crisp acidity, not quite as much fruit as I’d like to see.”
Well, that’s as far as my notes go. Nobody was talking about long finishes or specific kinds of fruit on the nose or palate, but all in all, for a first outing, it wasn’t bad. As I said in a Facebook post, I had walked in with nightmares that my fellow tasters would spit my wine on the floor and then throw me out of the room. It was a relief to see that they all stayed and finished their taste of Bob’s Tempranillo.
Tempranillo, Part II: The Hydrometer Never Lies
I was pretty excited last Monday when I began making six gallons of Tempranillo wine. I thought I had been pretty clever in the way I had gotten the temperature just right before pitching the yeast, and I was pretty confident that things would go well.
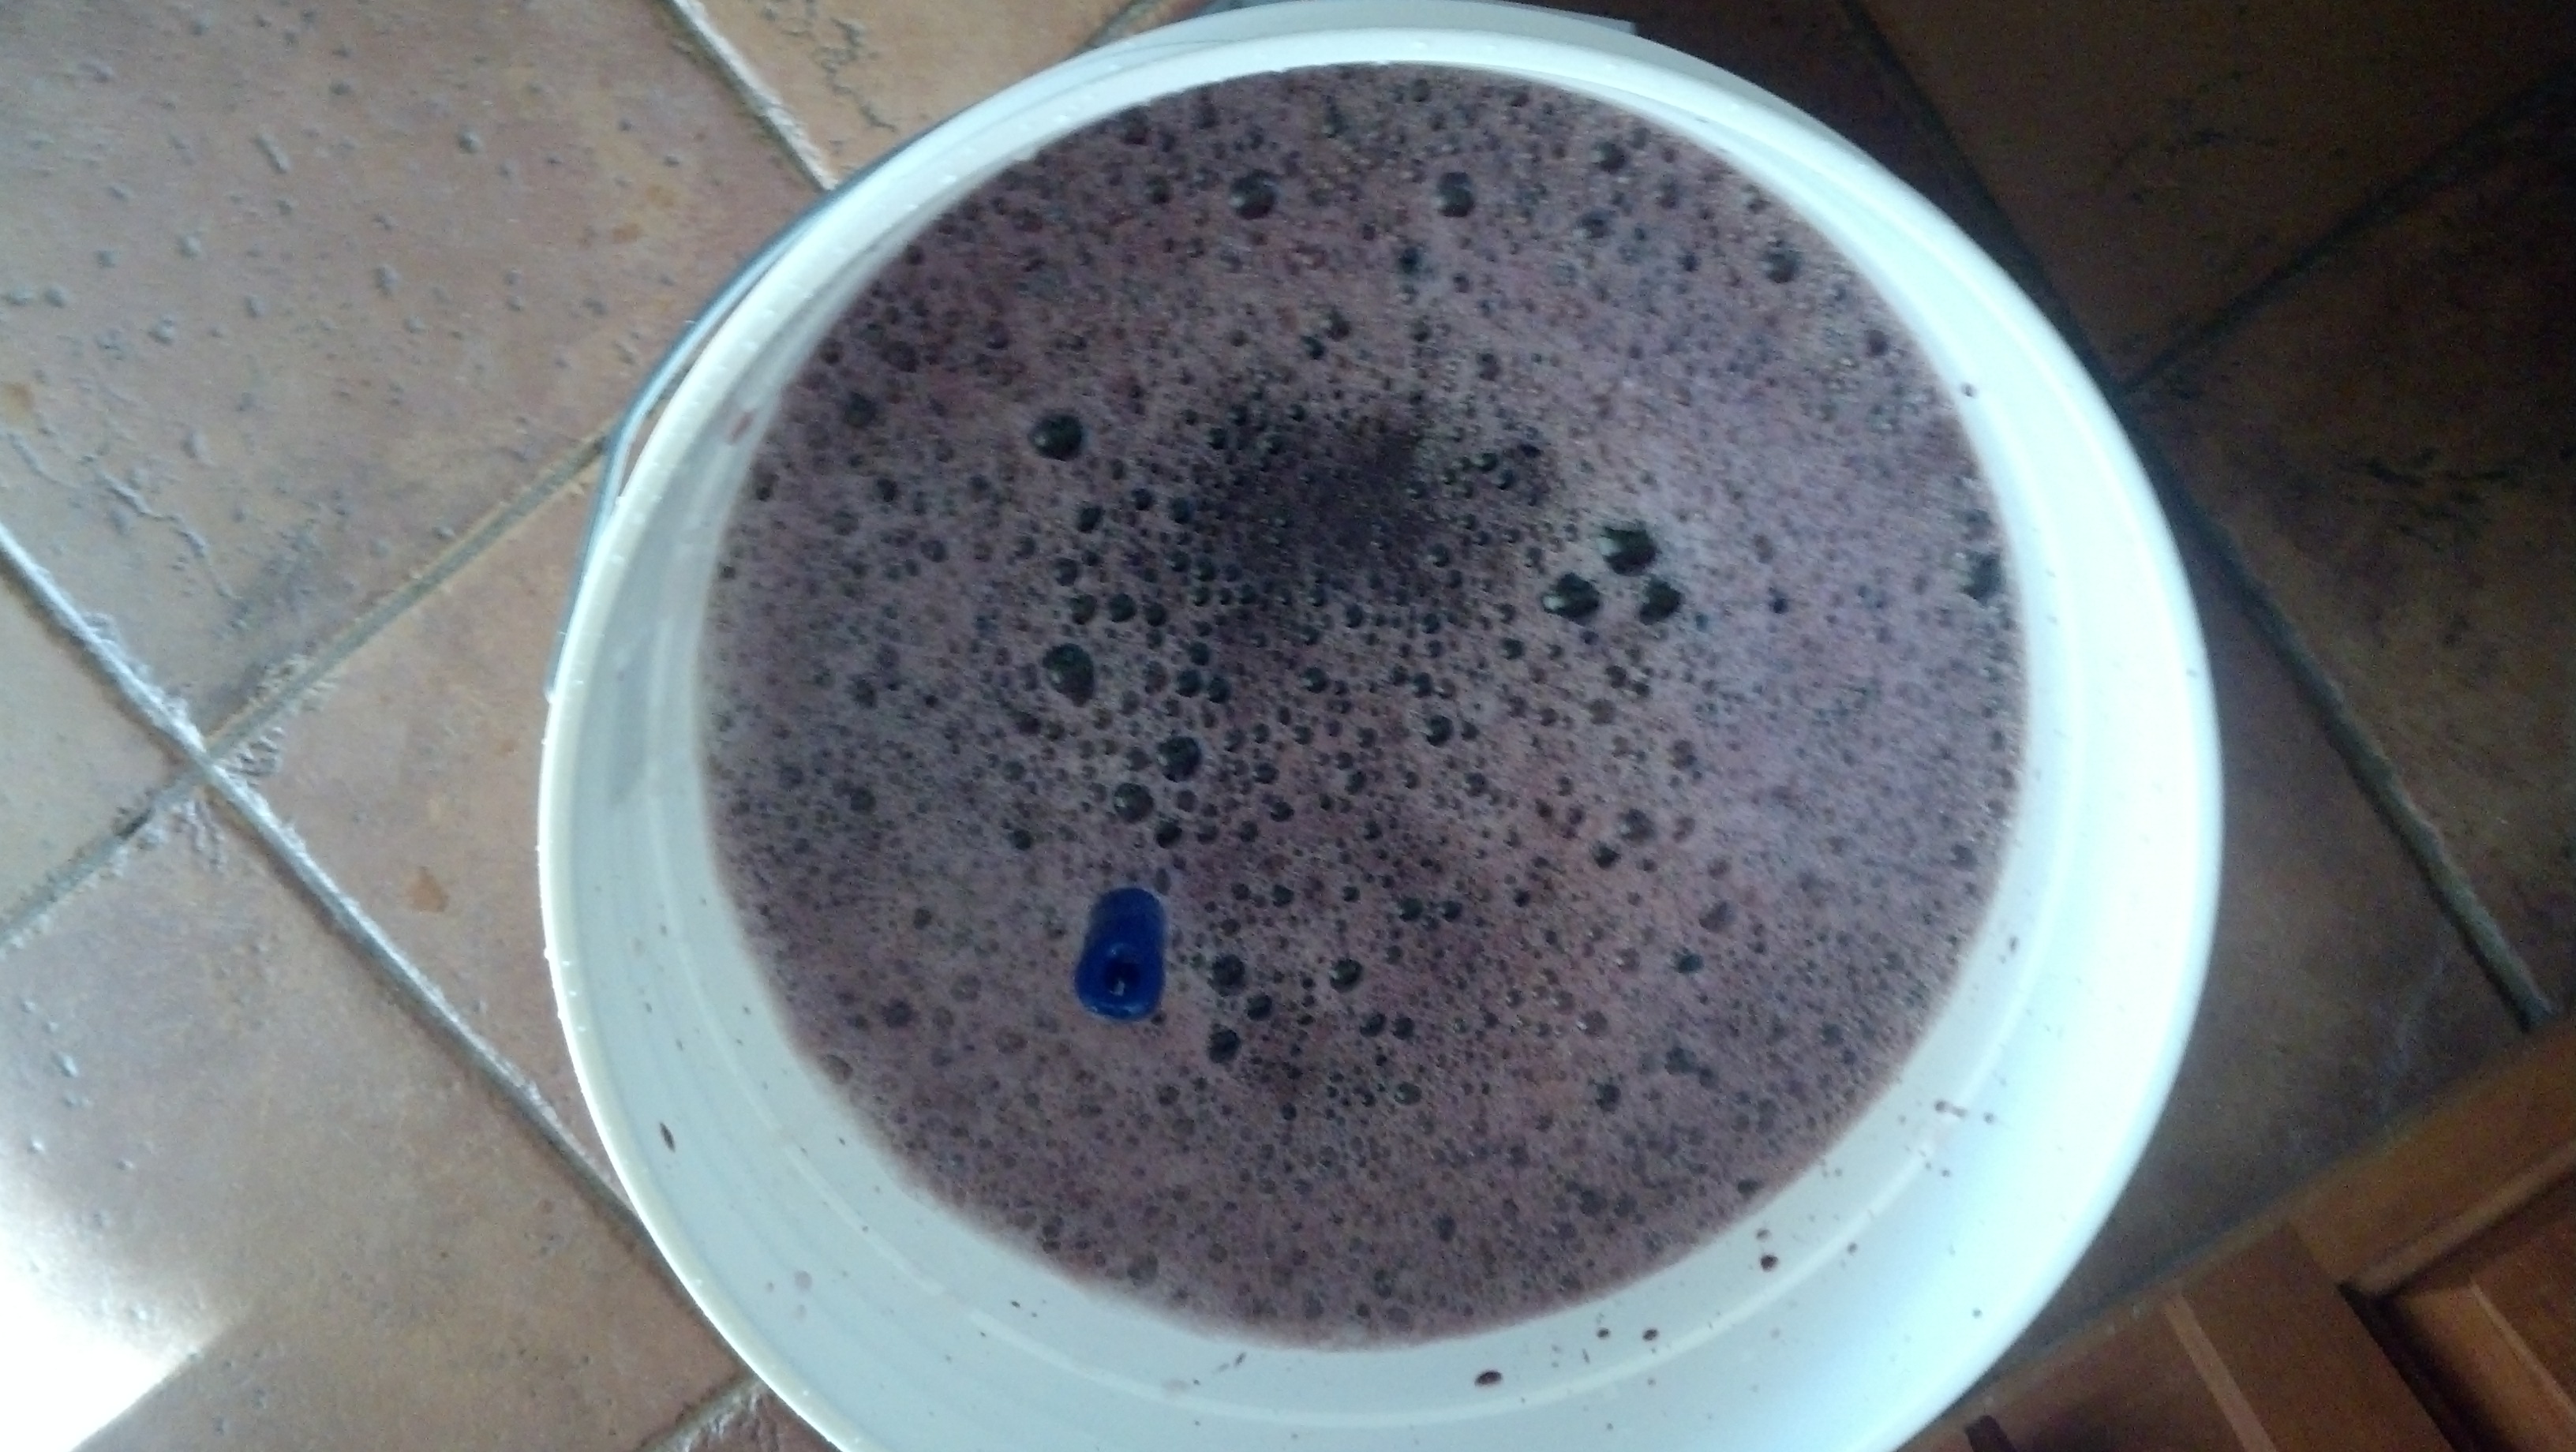
The must on Day One, floating thermometer barely visible..
And 24 hours after inoculating the unfermented must with yeast, I was pretty sure fermentation was well underway. The airlock was beginning to accumulate carbon dioxide, or CO2, bubbles and there was a fragrance in the air that I have always associated with fermentation. Also, there was a loud hissing sound inside the primary fermenter said there was something alive and growing inside. Yeast is a truly amazing microorganism.
Forty-eight hours in, I was beginning to worry. The airlock wasn’t bubbling up and down in the vigorous way I had expected, and I wondered if the fermentation had become stuck. Or worse, if it had actually been stillborn, and I had only been deluding myself the day before. I punched down the grape skins for a couple of minutes (the grape skins are pushed to the top of the fermentation vessel by the CO2 released during fermentation, and they must be “punched down” daily to ensure proper contact with the must – more on this in a later post) and then checked the temperature.
The results were a bit scary – almost 90 degrees. Apparently the heater I was using was a blunter tool than I had thought. That seemed a bit unjust. The last time I made wine, fermentation took forever, and was briefly stuck because I had let the house get too cold. Now, I had apparently gone too far in the other direction.
On Thursday, I was feeling even worse about the fermentation. I had shut down the heater, and the temperature had dropped to the low eighties.
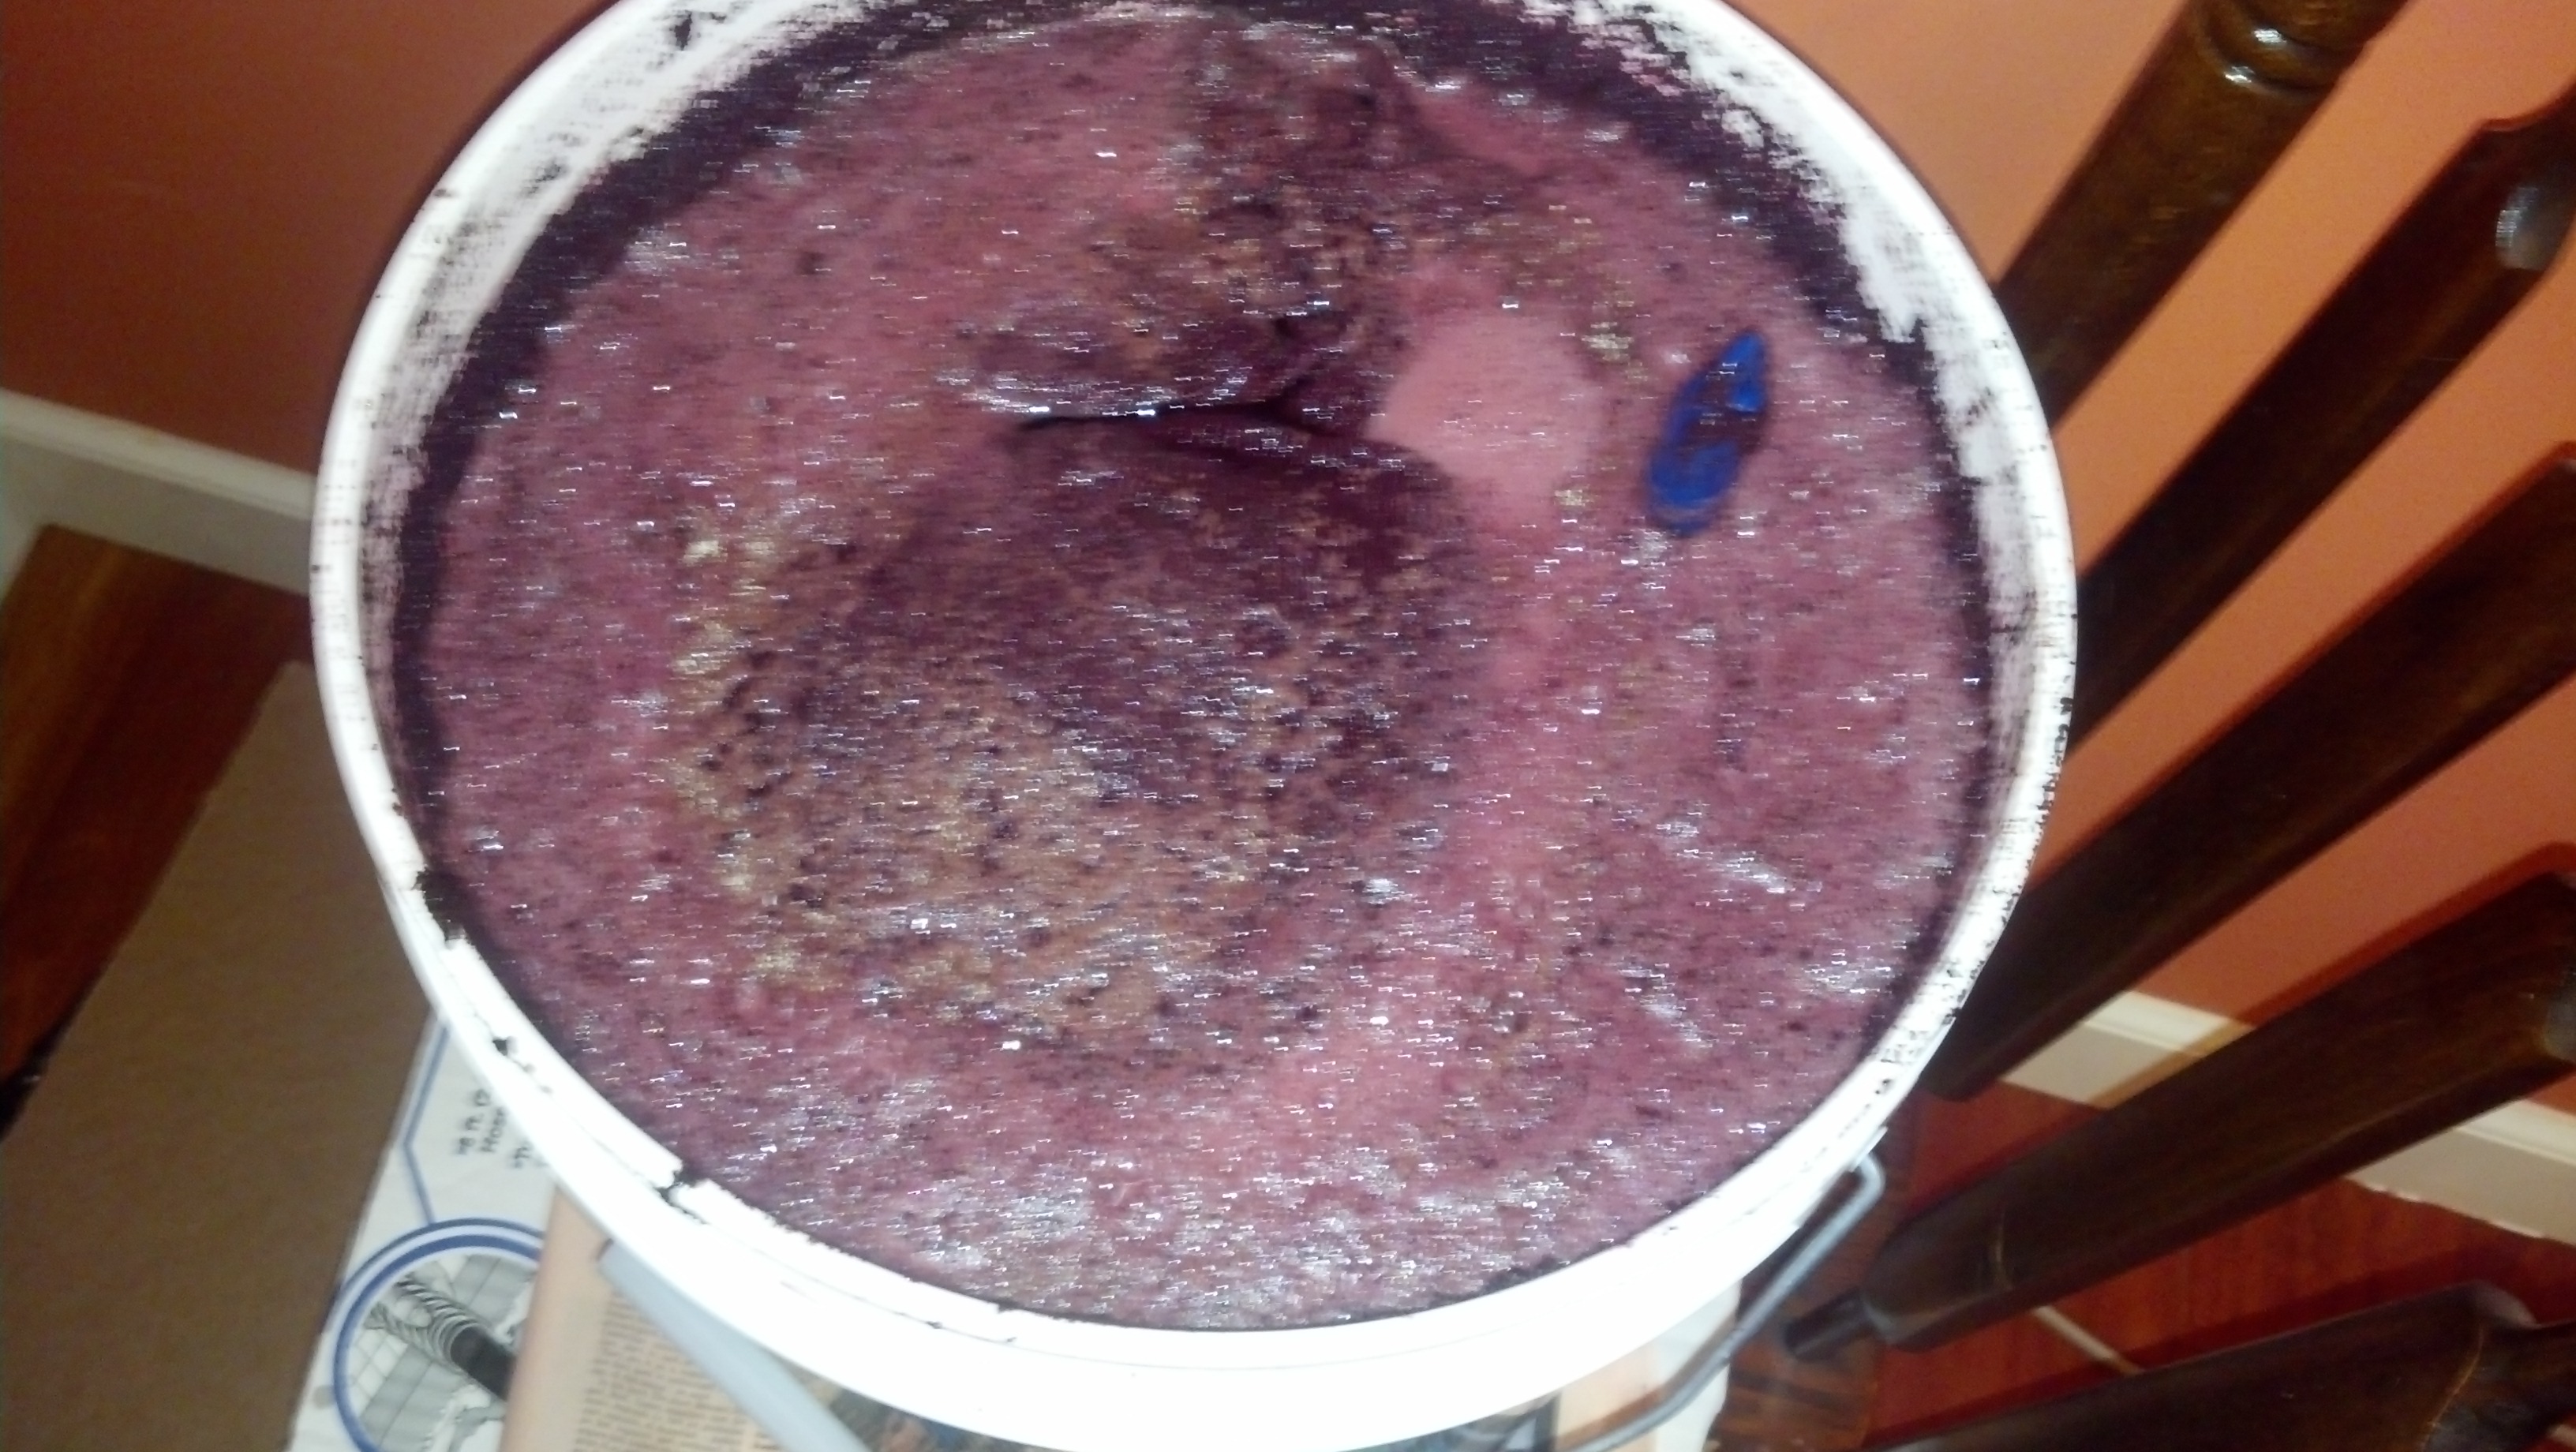
twenty-four hours later, fermentation appeared to be clearly underway.
Better for fermentation, but probably still a bit too hot to re-inoculate. I knew I could get the temperature down, but I wasn’t really sure how to go about reinoculating.
I had packages of two different kinds of yeast: RC212, which was the particular kind of yeast that came with the kit, and EC1118, a champagne yeast that is also supposed to be good for restarting stuck fermentations. I wasn’t sure which to use, whether I should rehydrate the yeast with some of the juice before pitching it, or whether I should get the temperature down first. So, I called the company’s technical support line.
I was using a Winexpert kit, and I can’t begin to say enough about their customer support. I got a real person on the phone in a couple of minutes, and she was terrific. Here’s how the conversation went (picking up after I explained the problem):
She: What was the specific gravity when you pitched the yeast?
Me: 1.082
She: What is it now?
Me: I haven’t checked, but since it doesn’t seem to be fermenting, I assume it’s still right around 1.08.
She: You need to check. Give me your number, and I’ll call you back in ten minutes while you take a reading.
Me: OK.
After about ten minutes, she called back.
Me: I just finished sanitizing the hydrometer and wine thief and I’m just filling the tube (for the hydrometer).
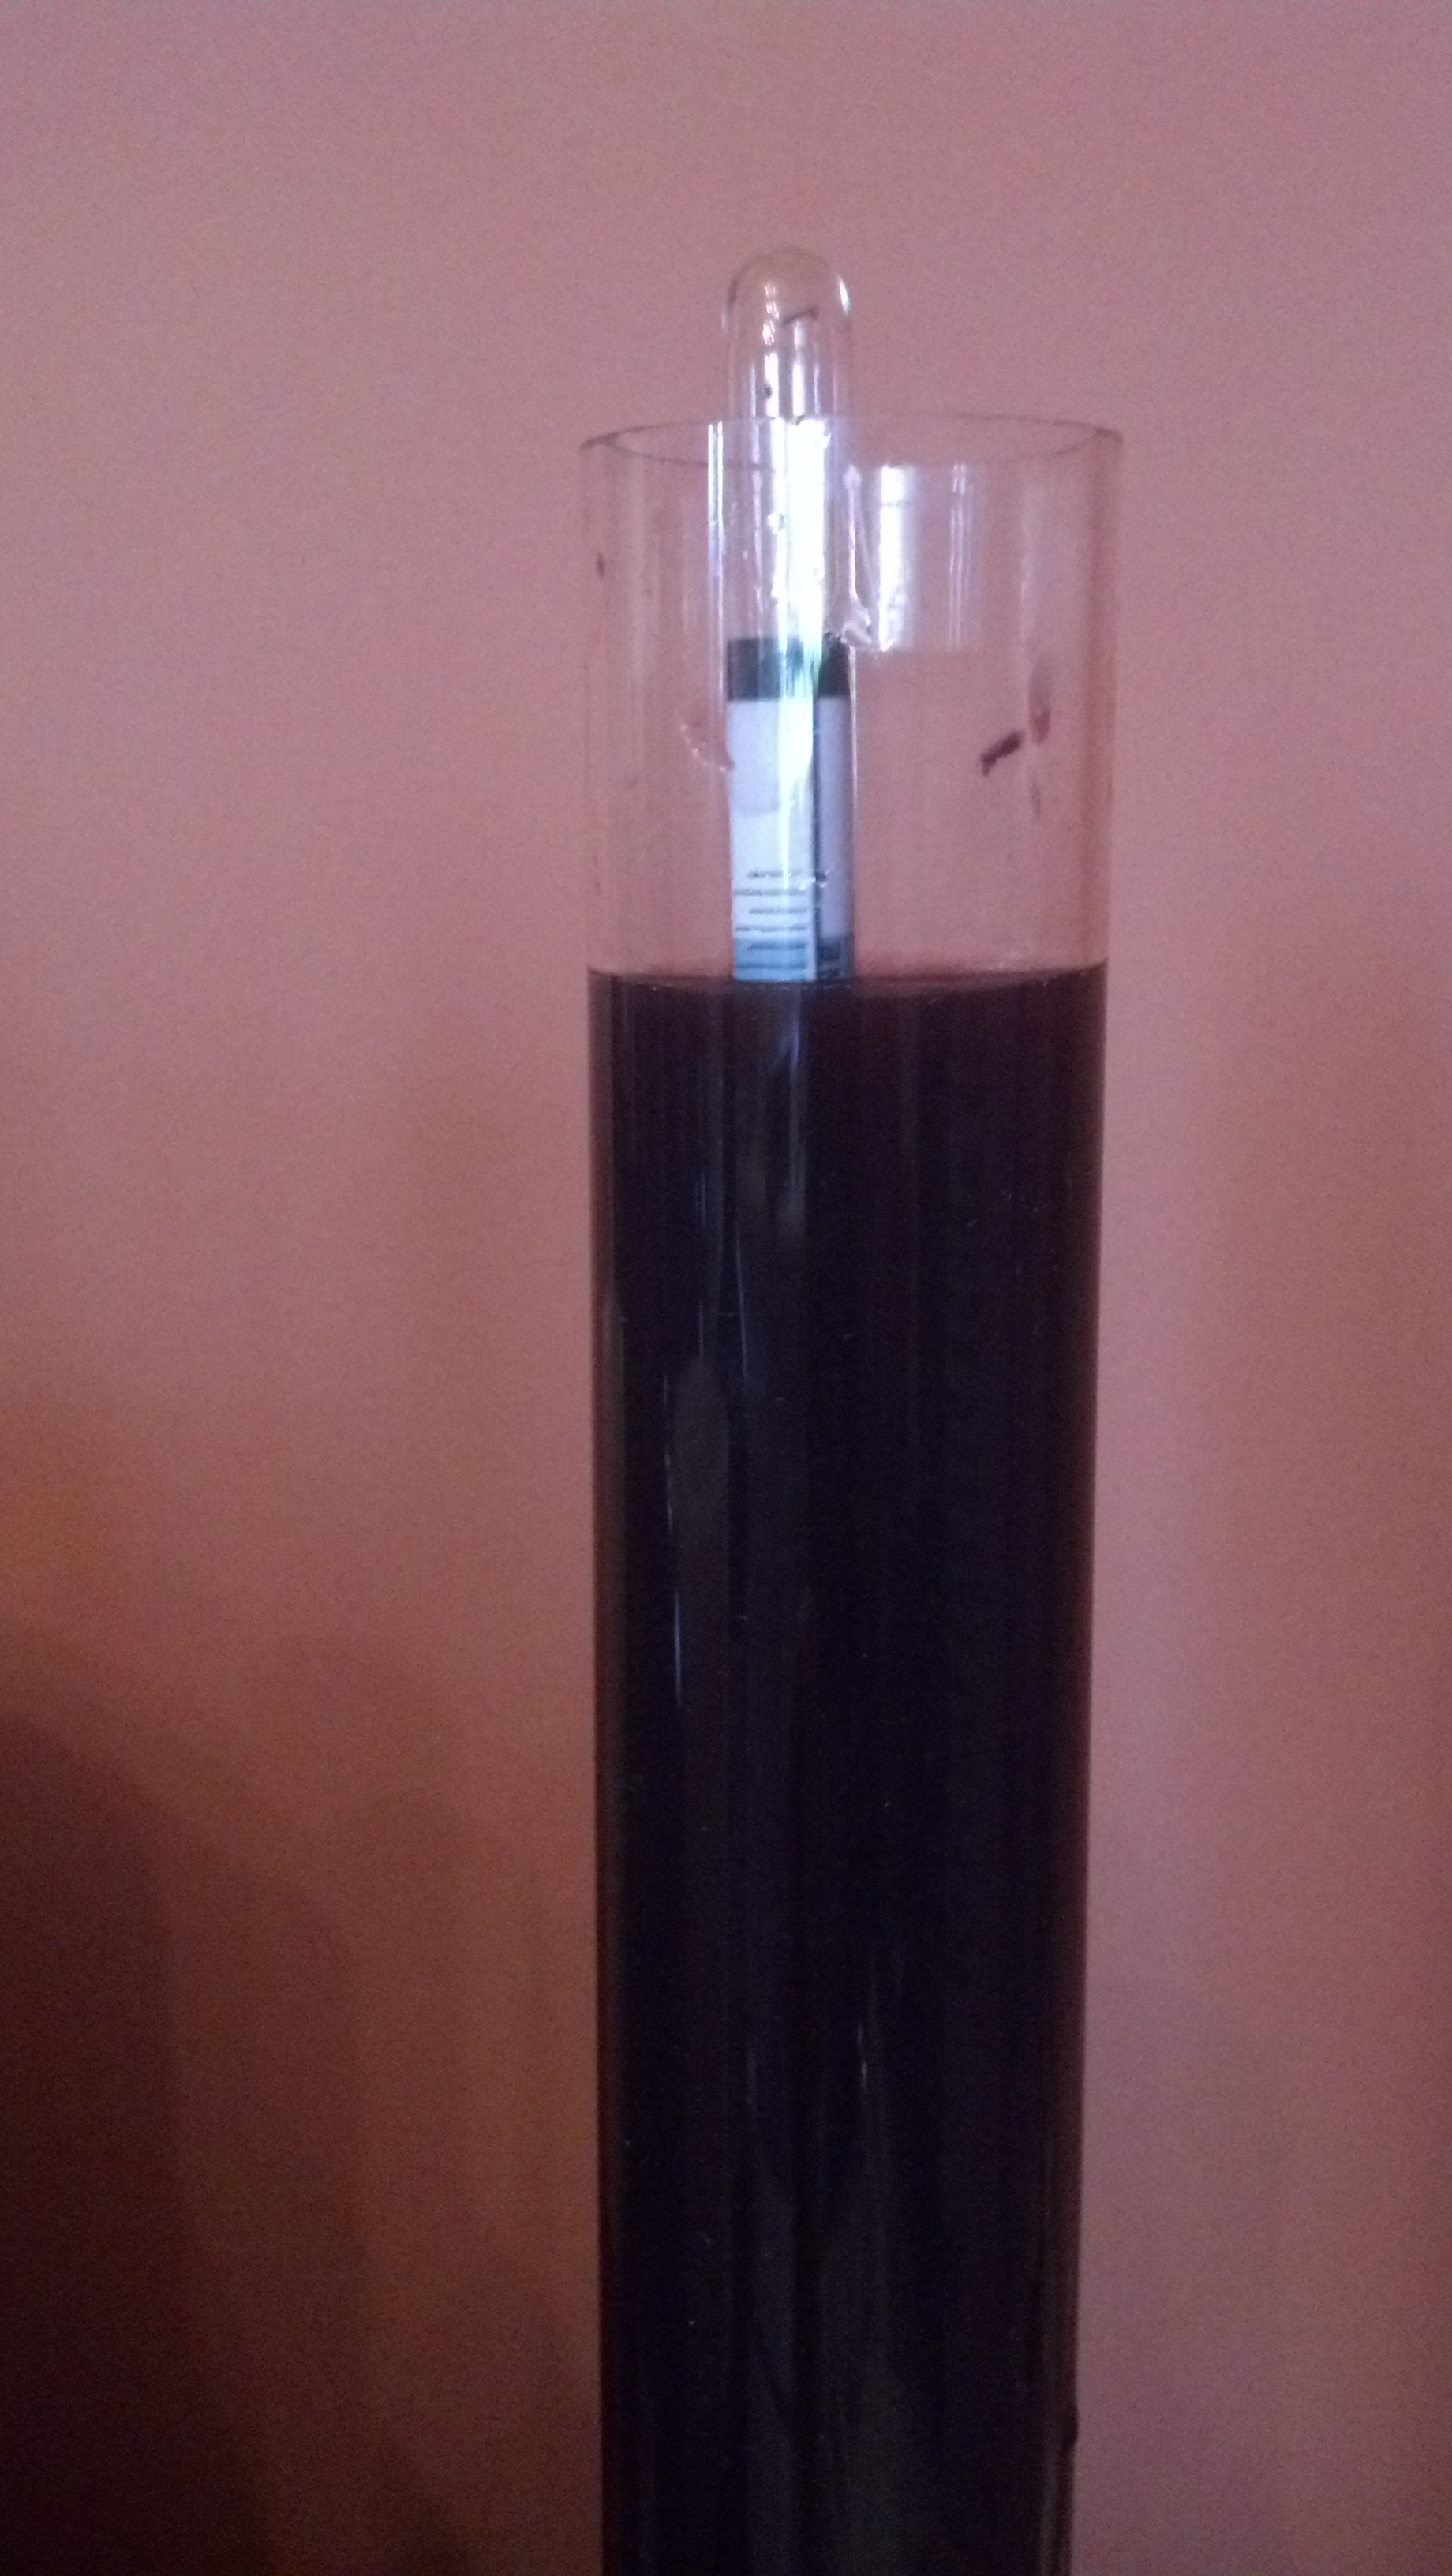
Here’s the hydrometer, still bobbing up and down in the test tube.
She: OK.
Me: Uh. . . Can this possibly be right? It looks like it’s 1.02.
She: You got it! It’s working.
Me: Uhhhh . . . yes, it is. (but thinking, yes, I am an idiot. . .)
What I learned from her was to rely on the hydrometer, not my visual checks. She was good enough to stay on the phone with me for another five minutes to talk about winemaking and to answer a few more questions about the kit. Honestly, it was one of the best customer support experiences I’ve ever had.
So, I let the wine continue fermenting. Twenty four hours later, the specific gravity was down to 1.011, and the night after that, it was just a hair over 1.000, maybe 1.001. Sunday morning, I’ll check again, and I think it will be time to rack it into a carboy for the secondary fermentation.
Meanwhile, I’m planning to start making a new batch of wine in a week or two, this time Winexpert’s Lodi Ranch 11 Cabernet Sauvignon. And I’ll be relying less on visual observations and more on things I can measure, like temperature, pH, and specific gravity.
After all, your eyes may deceive you, but the hydrometer never lies.
Making Tempranillo, Part I
So much of what I’ve written on Project Sunlight has to do with the vineyard – planting vines and tending them until they’re ready for that first harvest. Well, okay, we’re actually a long ways from that first harvest, so in fact most of what I’ve written has to do with that first year in the vineyard, from preparing the ground to planting and caring for the vines over the course of that year. Someday soon, I hope to write the next chapter, the one that has to do with turning simple grapes into something noble. But we have at least another two years before we take that step and make wine from our grapes.
And yet, I want to make wine – now. So, what to do? I am very hopeful that next fall I’ll be able to buy fresh fruit from somebody else’s vineyard, and make wine from those grapes. But that’s a long ways away, and I’m feeling a need to get some experience with the whole process of fermentation before I start playing with freshly harvested grapes. It’s also possible I’ll be able to buy some grapes shipped in from Chile in the next month or so (the southern hemisphere runs opposite to our world – our fall is their spring, and their spring is our fall), but I’m not sure about that.
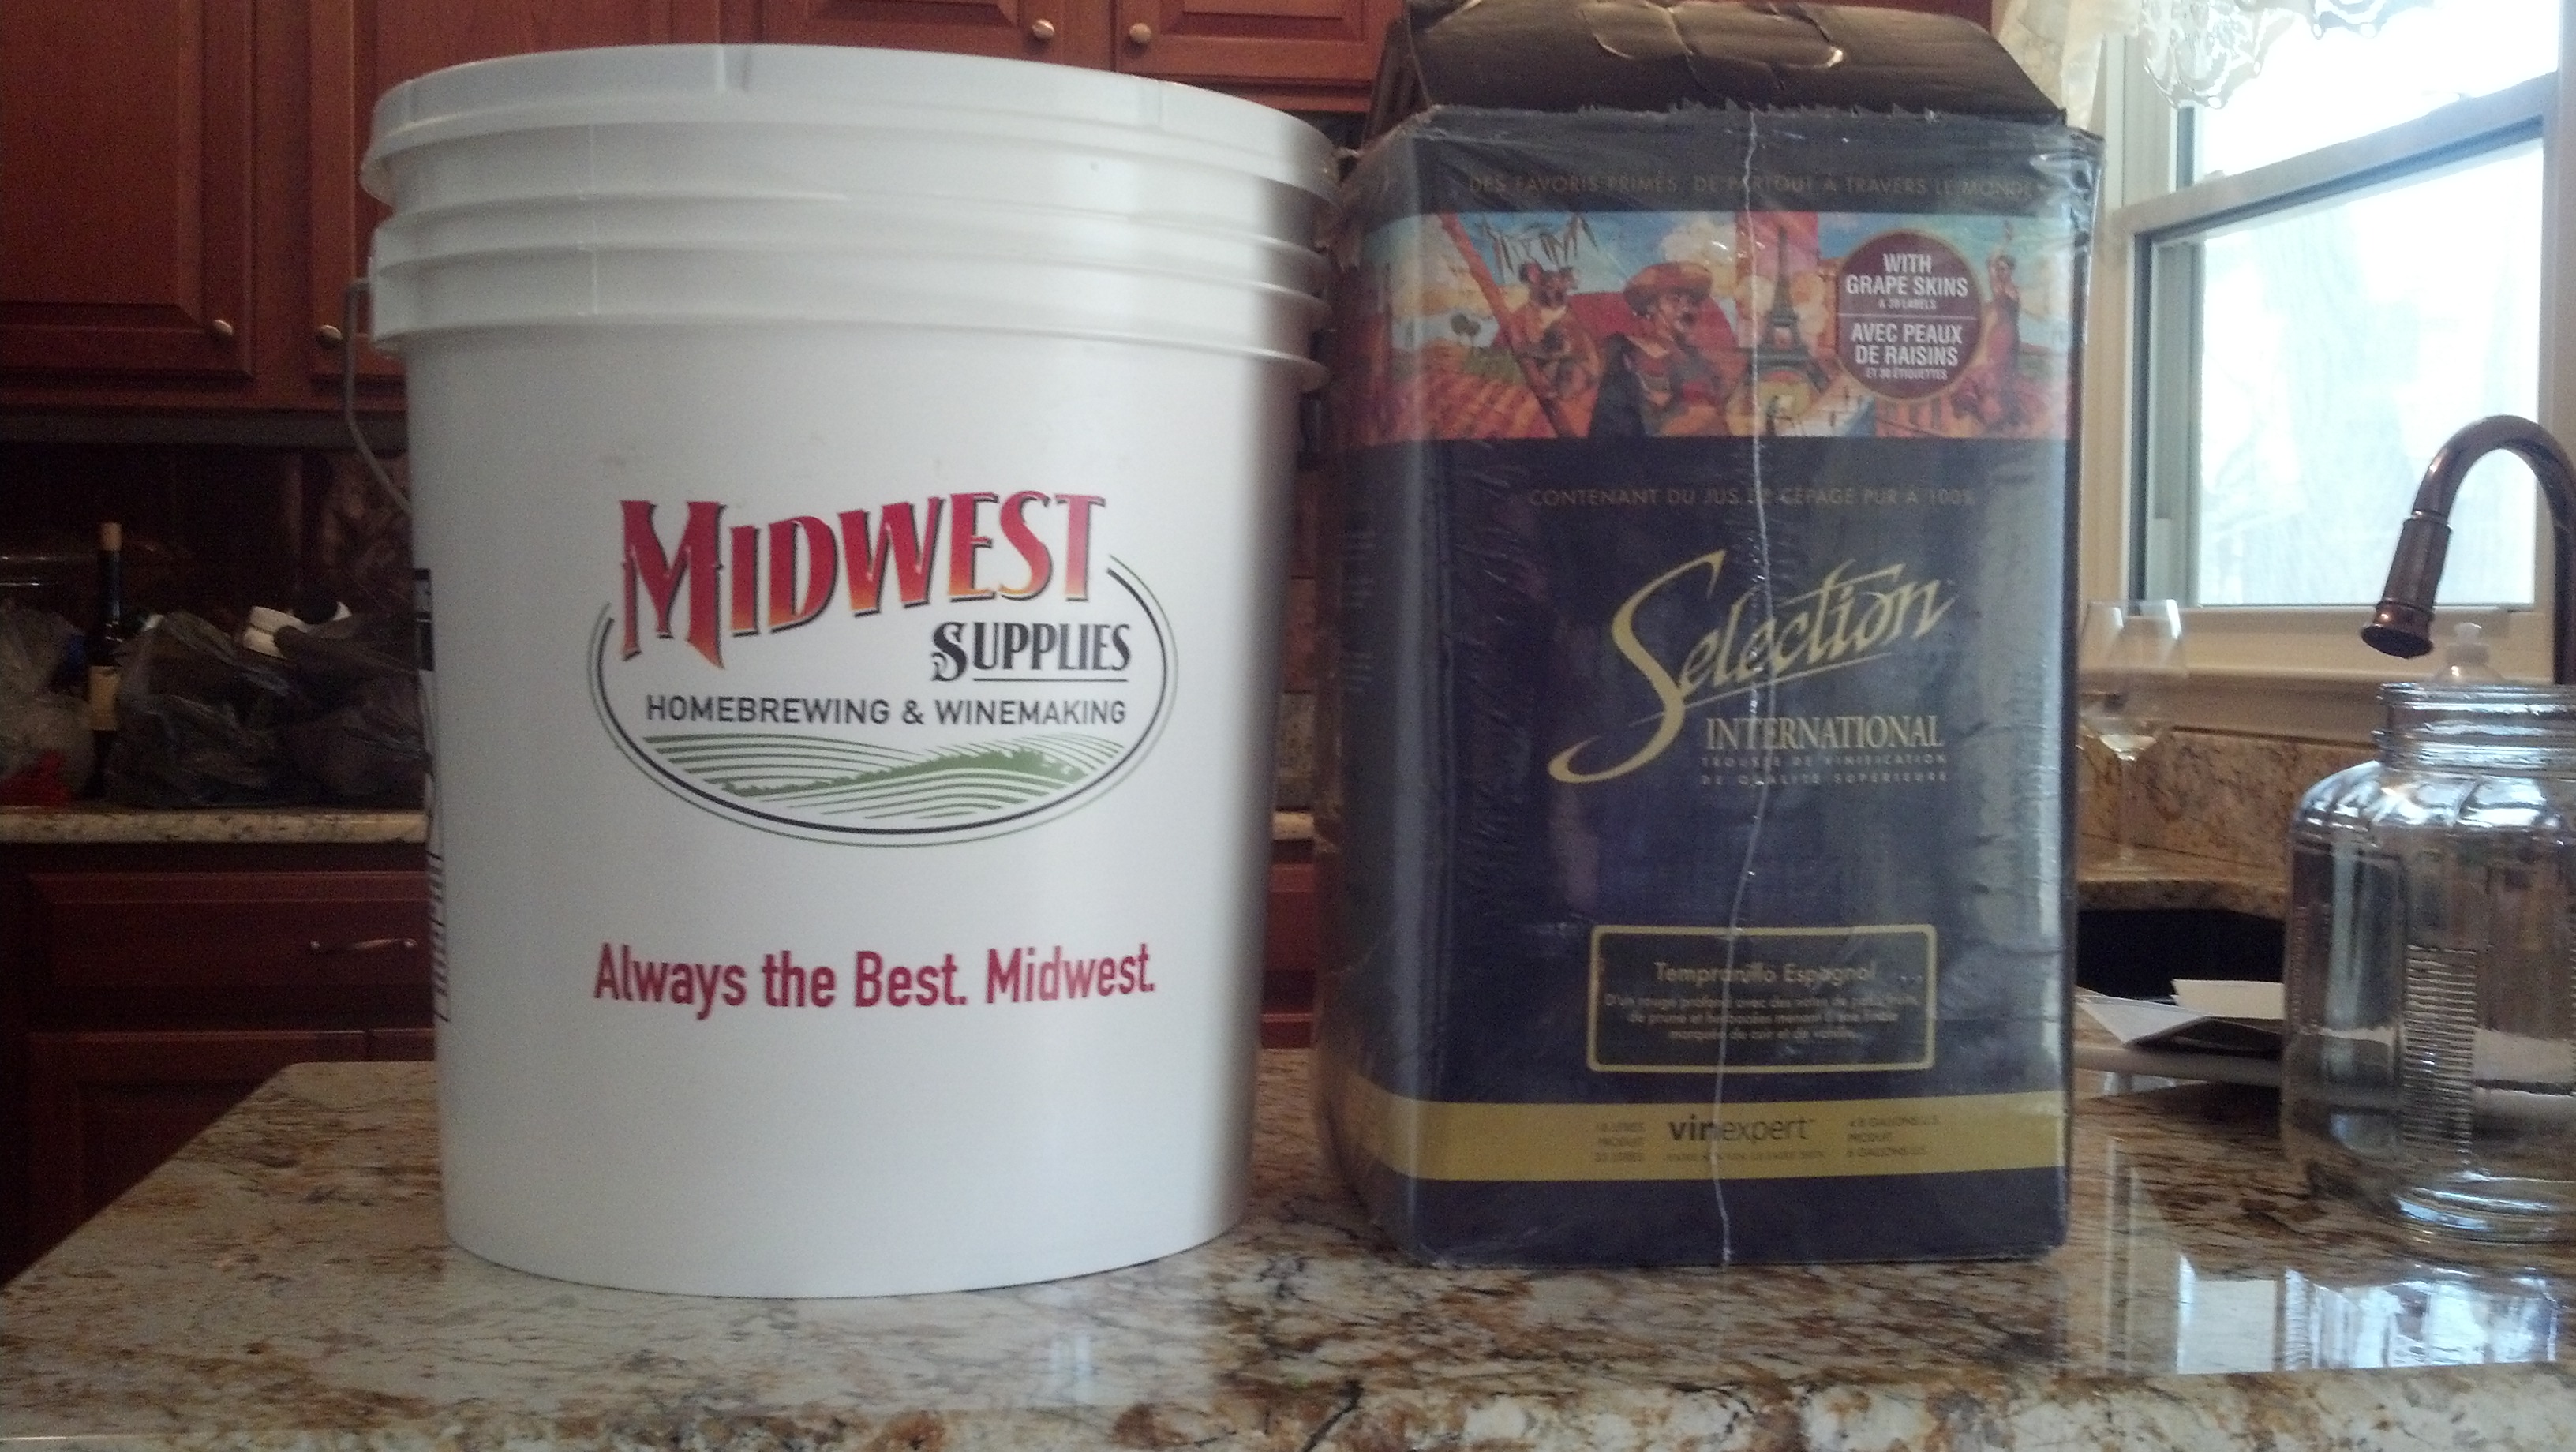
Here’s the 7.9 gallon fermentation bucket next to the box containing the juice and grape skins
Wine kits, though, offer a world of possibilities – literally. You can get kits that contains juice and crushed grapes from Argentina’s Mendoza region or South Africa’s Western Cape. You can buy Chilean Cabernet Sauvignon or Australian Shiraz or Oregon Pinot Noir, for that matter, and make those wines at home whenever you want.
Years ago, I turned my nose up at the idea of making wine from a kit. But from what I’ve read over the past few years, kits have gotten better and better. Two years ago, after receiving a starter set with all the equipment from my daughter as a Christmas gift, I tried my hand at one. I made so many mistakes that I should have been grateful to have ended up with decent vinegar. But I worked hard at it, and when I was finished I decided that the very least I could say about it is that it was honest to God wine.
I wondered if that would be the most I would ever be able to say about it as well, and I suppose the answer is somewhere in the middle. It wasn’t great wine, but my kids liked it well enough to ask me to bring a couple of bottles with me when I traveled out to visit (in California, no less), so it at least found an audience. And every time I open a bottle, I tell myself, “Hey – this ain’t so bad.” And yes, I know – that’s a pretty low hurdle.
In any event, I decided to try my hand at it again. This time, I’m making a Spanish Tempranillo, one of my favorite varietals. The kit was made by Winexpert, and it came with a bladder of juice, a smaller bladder of crushed grapes, and of course all of the yeast, fining agents and the like that one needs to turn the juice into wine. Continue Reading–>
Natural Wine, part I: Alice Feiring’s “Naked Wine”
Alice Feiring: Naked Wine
One of the most arresting moments in Alice Feiring’s book on natural wine is occasioned by a question she posed to Jacque Neauport, one of the movement’s pioneers, on what motivated him to make wine without sulfur. He is momentarily speechless,  then nearly convulsed with laughter.
“Because we were drunkards!” he finally responds, explaining that they hoped that wine without sulfur would allow them to drink heavily and avoid hangovers. Ms. Feiring is clearly shocked. “I had come to the oracle for answers, and all he had for me was a punch line,” she writes.
There’s something disarming about these passages, although I suspect that readers who have been put off by her writing style and dogmatic approach to natural wine will take some pleasure in her discomfort. My reaction was different. I’m not sure I would have had the courage or confidence to retell a story like this, so it made me like her, as well as her book, a good deal more than I had up to that point.
Early on, I wondered if I would be able to recommend Naked Wine, or for that matter, even finish it. Her book is written in the style of a blog, and it is infused with her personality. If you happen to like that personality, you will probably like the book. If you find her style, as a friend of mine did, “annoying,” then you will find much of the book insufferable.
At the end, I’m somewhere in the middle. The book is definitely not for everyone, but for those interested in making an initial foray into the world of natural wine, it’s a pretty good introduction. Continue Reading–>
Five Vintages of Cab Franc at Gadino Cellars

As I’ve said before, I believe that Cabernet Franc is Virginia’s signature red grape, even if Petit Verdot iscoming on strong. It is more cold-hardy than Merlot or Cabernet Sauvignon, and it ripens earlier. That’s important in Virginia, which can be prone to early frost, Fall rains, and the occasional harsh winter. And Cab Franc is a wonderful grape on its own. It has softer tannins than Cab Sauv, and while it might not be quite as age-worthy, wines today are being made (and

- Five Vintages of Cab Franc waiting to be poured, along with a mystery wine, hidden in brown bags for blind tasting

purchased) for early drinking, not for years in the cellar. Cab Franc will age, of course, but it is also more accessible when young than the more tannic reds. And Cab Franc can be used on its own or as a blend to make wines with great complexity, as the great St. Emilion blend, Cheval Blanc, demonstrates.
Cab Frank is particularly important to my wife, the Vineyard Goddess, and me, because it’s one of three grapes we will be planting this Spring, the other two being Petit Verdot and Viognier. (We had hoped to plant Petit Manseng as well, but couldn’t find the certified vines we wanted.)
So, I was thrilled to have the opportunity Saturday to participate in a vertical tasting of Cab Francs at Gadino Cellars in Washington, VA (Rappahannock County). We tasted wines from 2005, 2006, 2007, 2008, and 2009, plus a barrel sample of the 2011. The Gadinos threw in a mystery wine, which we tasted blind. More on the mystery wine later. Continue Reading–>
Bringing in the Grapes – IV
The harvest is so full of unknowns. You never know exactly when the grapes will ripen – when the pH, Brix, tannins, flavor, and so many other variables will all be perfect – and so vineyard managers study the vines each day as

Cab Franc, waiting to be picked
the growing season nears the end, squeezing juice from a random selection of grapes onto the refractometer, checking the seeds, examining the skins, measuring the pH, tasting the juice, and no doubt thinking, “Why me, God – why do You make me suffer each fall?”
But of course, that’s what makes viticulture the wonder that it is. Each season is different. So much work goes into growing the grapes and then so much judgment and so much hope goes into the decision about when to harvest.
Without a doubt, this has been the most difficult growing season in memory in Virginia. It’s hard enough to fathom out the date when the grapes will achieve the perfect balance of sugar and acid, without the additional complication that comes from weather. Consider this: If the grapes will be perfect on Wednesday, but it rains on Tuesday, then you probably would have been much better off picking on Monday, when they were a few days shy of perfection.
And here’s another twist: if it rains on Sunday and Monday, and the grapes swell from the

After a season of work and worry, the harvest is a joyous occasion.
precipitation, you might think it wise to wait until Thursday or Friday to give them a chance to recover. If the sun comes out and stays out, you will think yourself a genius. But if it rains again, you may curse your stupidity.
Rain causes so much trouble at harvest. The grapes swell and split, bees attack, and the vineyard is ravaged by sour rot and botrytis. Botrytis is a problem, but it can be dealt with in the winery. Sour rot is different. You can see it and smell it, a sour vinegary odor that is apparent in the juice that breaks out of the berries and covers your hands. It’s best to let those grapes fall to the ground.
Every year brings something new, and this year when we arrived at DuCard Vineyards to pick Cab Franc, it was unseasonably cold. The thermometer read 47 degrees when we woke, and didn’t get above 50 until 8 a.m. At that temperature, it would be hard to get the grapes to begin fermenting, so we waited until 10 a.m., after the morning had warmed up just a bit, to start picking.
And what a glorious day it turned into!

Here's the difference between a good harvest and a bad one -- how you pour the grapes into the crusher. 🙂
As Scott Elliff, owner of DuCard Vineyards said on a recent Saturday, this is what we’ve been working toward all year! This is the harvest – this is the fun part!
He was right. It was like a celebration. We (the Vineyard Goddess and me) spent that day at DuCard picking Cab Franc grapes with a dozen of our friends from viticultural classes at Piedmont Virginia Community College. And while it was work, it was also joyous fun. Continue Reading–>


Recent Comments